WPCrest - Extended
A premium version of the free WPCrest theme. It is a child theme of WPCrest which provides various features not available in the free version which includes the ability of adding Slides, Services, Members and Testimonials to your posts and pages. It also provides page templates for creating an About page and a Contact page.

This is the official documentation accompanied with the WPCrest theme for WordPress. It covers everything you will need to set up and use the theme.
This theme is a product of Rhyzz, a web development firm which has been developing websites and blogs using WordPress since 2006. It has been leveraging it's abilities to develop projects with complex requirements using WordPress by taking it to a completely different level. It is the author of the WordPress Fields Framework plugin.
This experience combined with the weeks of effort that has been put into it's development makes WPCrest a unique and reliable WordPress theme. You can read more about this theme in the next section. The official support page for this theme is maintained here.
Table of Contents
Introduction
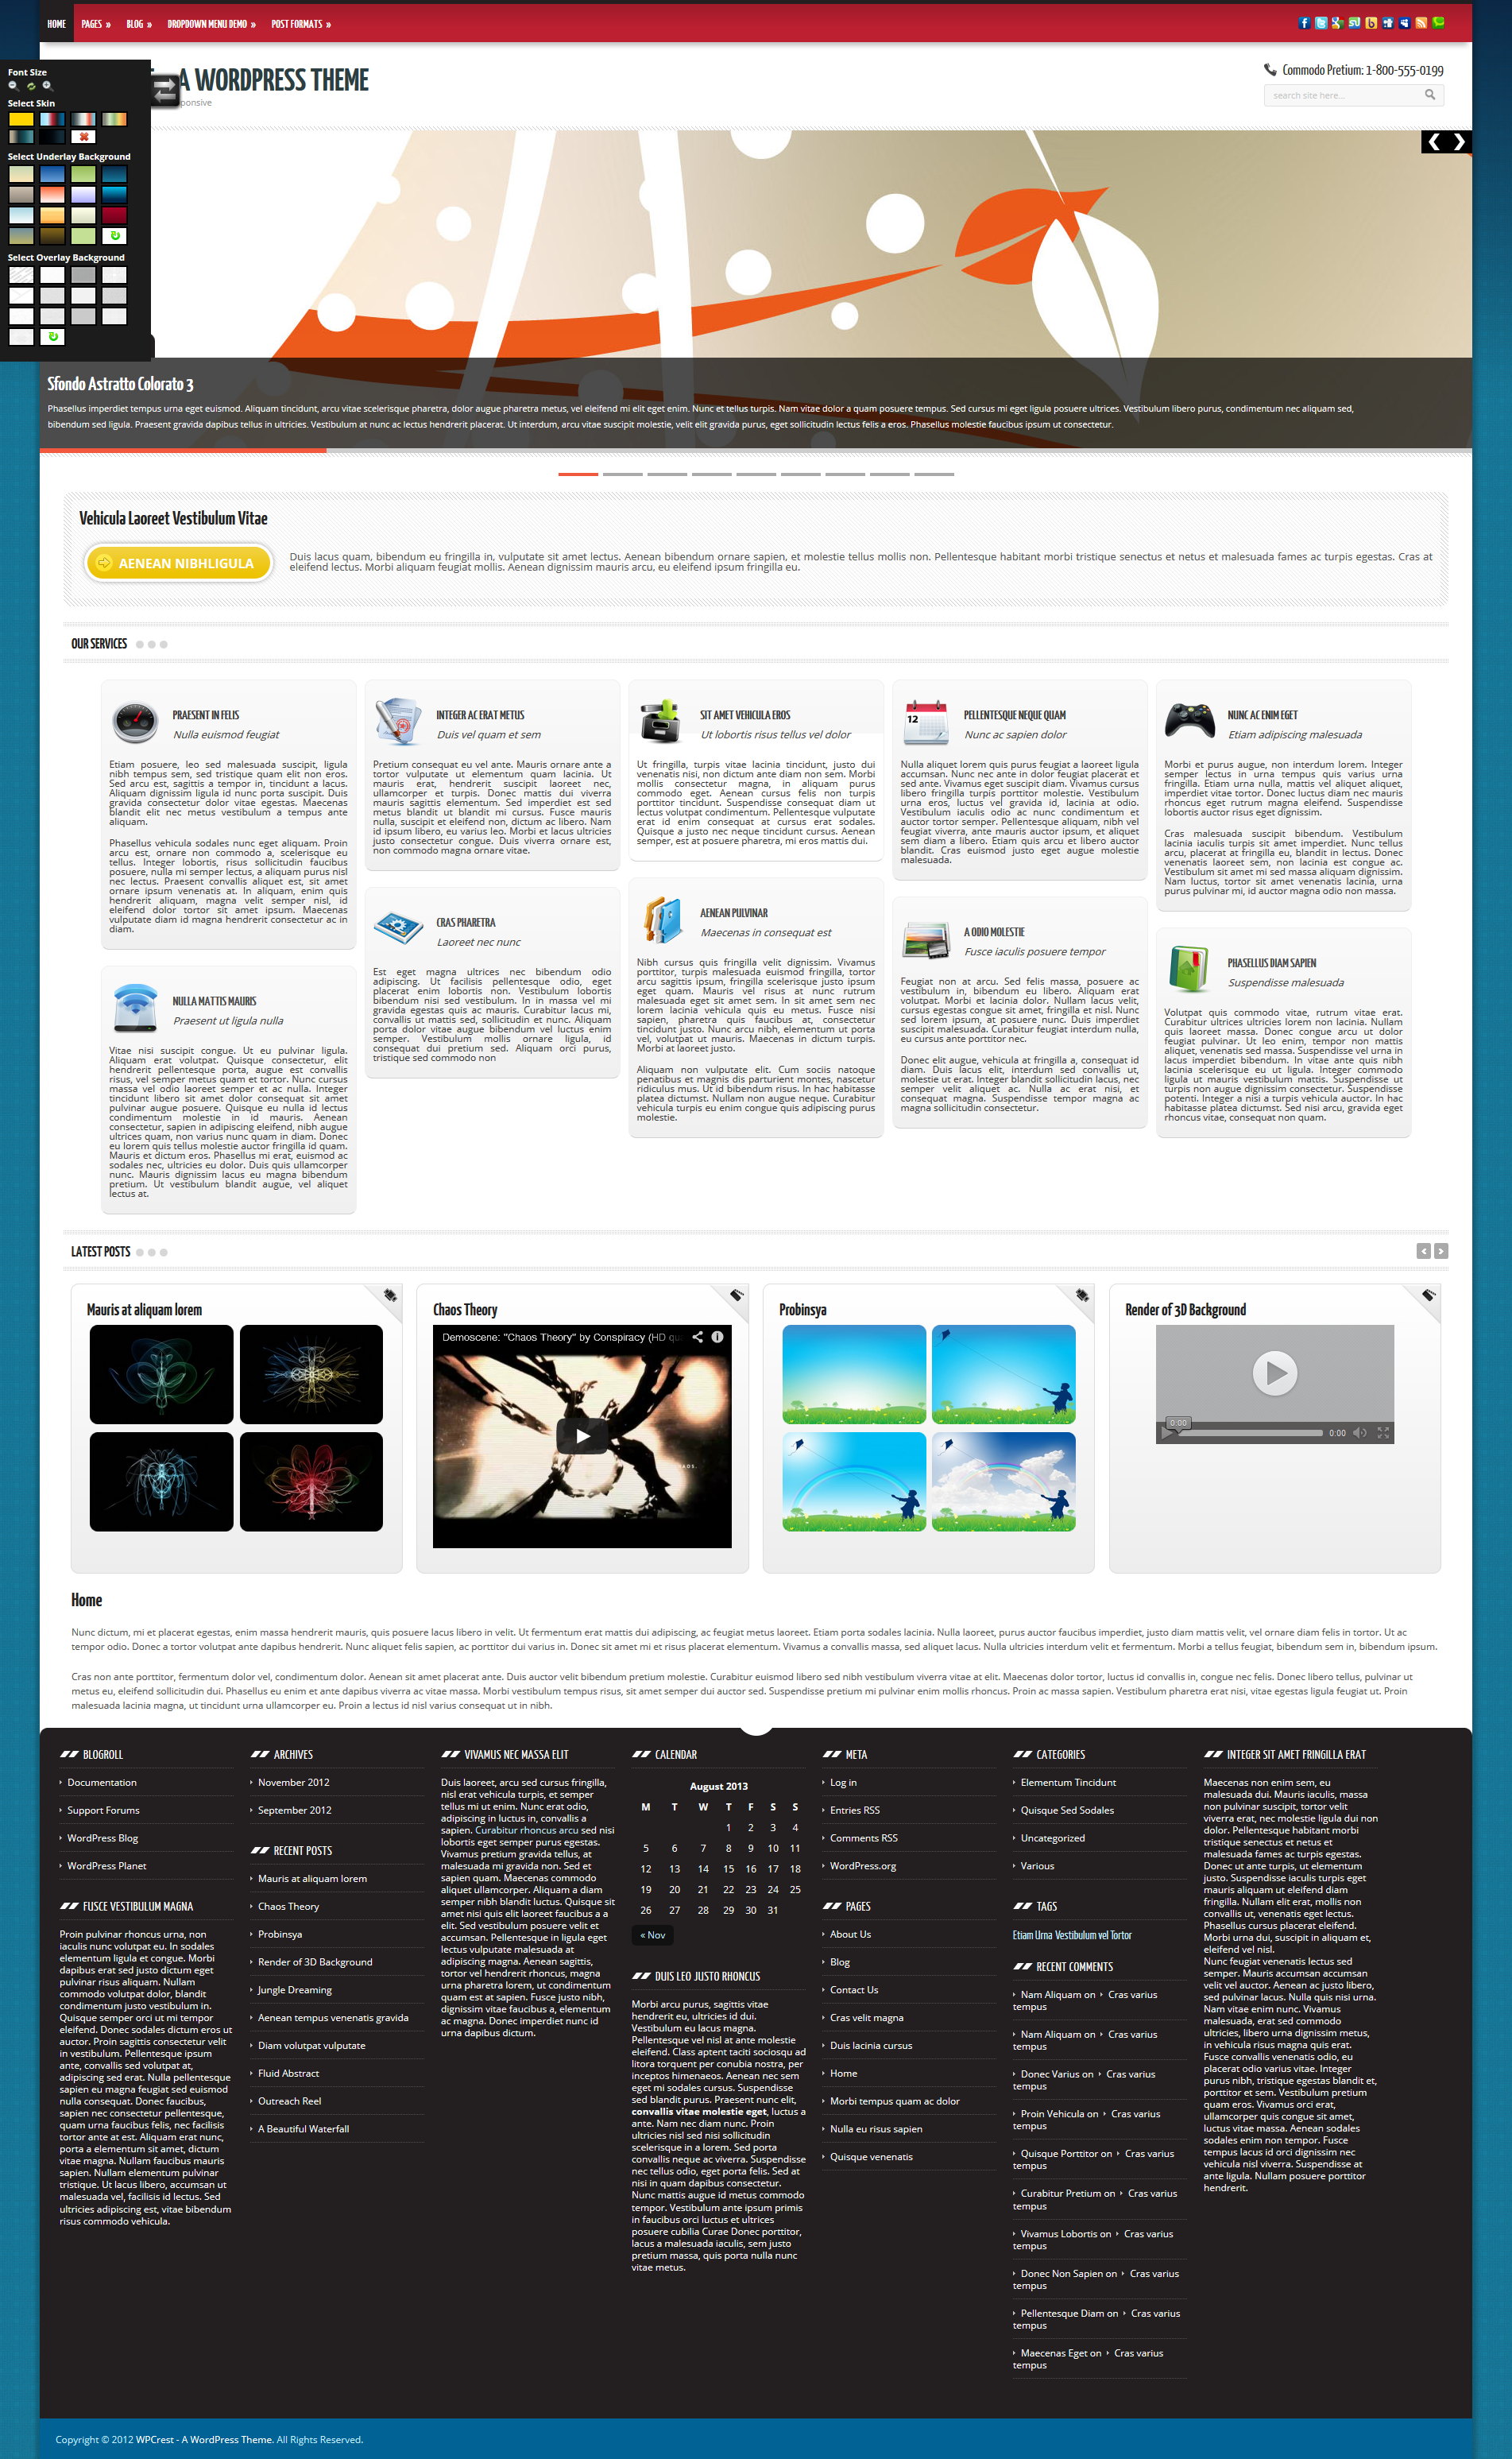
WPCrest is an elegant and easy to use WordPress theme which is responsive and uses a fluid layout. A responsive design is one which adapts the layout to the viewing environment to provide the best viewing experience to the user. WPCrest takes into consideration a wide range of devices which includes desktop computers, laptops, mobile phones and tablets. If the resolution depth being used by the user to view the website is small then the theme will shrink the layout accordingly to ensure easy reading and navigation. Regardless of whether a user is using a device which has a resolution that's 320 pixels wide or 1920 pixels wide, the theme won't compromise the user's experience browsing through your website.
To get a better idea of it's responsive nature, it is suggested you view the demo of the theme using a mobile simulator such as Opera Mini simulator.
Alternatively you can look at the screenshots numbered 24.jpg to 35.jpg. These images show how the theme adjusts depending on viewport's width.
Features
The theme comes packed with a number of features which are outlined below. They are grouped under 'For Users' and 'For Designers and Developers'. As a user you won't have to worry about the 'For Designer and Developer' features to be able to use this theme.
For Users
- Post Format support for Image, Gallery, Video and Audio
-
A Slider for creating slideshows
- A custom section for creating and managing custom slides which you can display using a slider
- A Scroller for displaying items of your choice which can include your Posts
- A Teaser which lets you display a title, a small description and a call to action button.
- Services section which lets you create and display a list of services offered. You can also associate every service with an icon.
- Members secthin which lets you create and display members of your team/business. You can also upload an image of the member.
- Ability to display all these (Slider, Scroller, Teaser) on the homepage automatically or using shortcodes on other pages
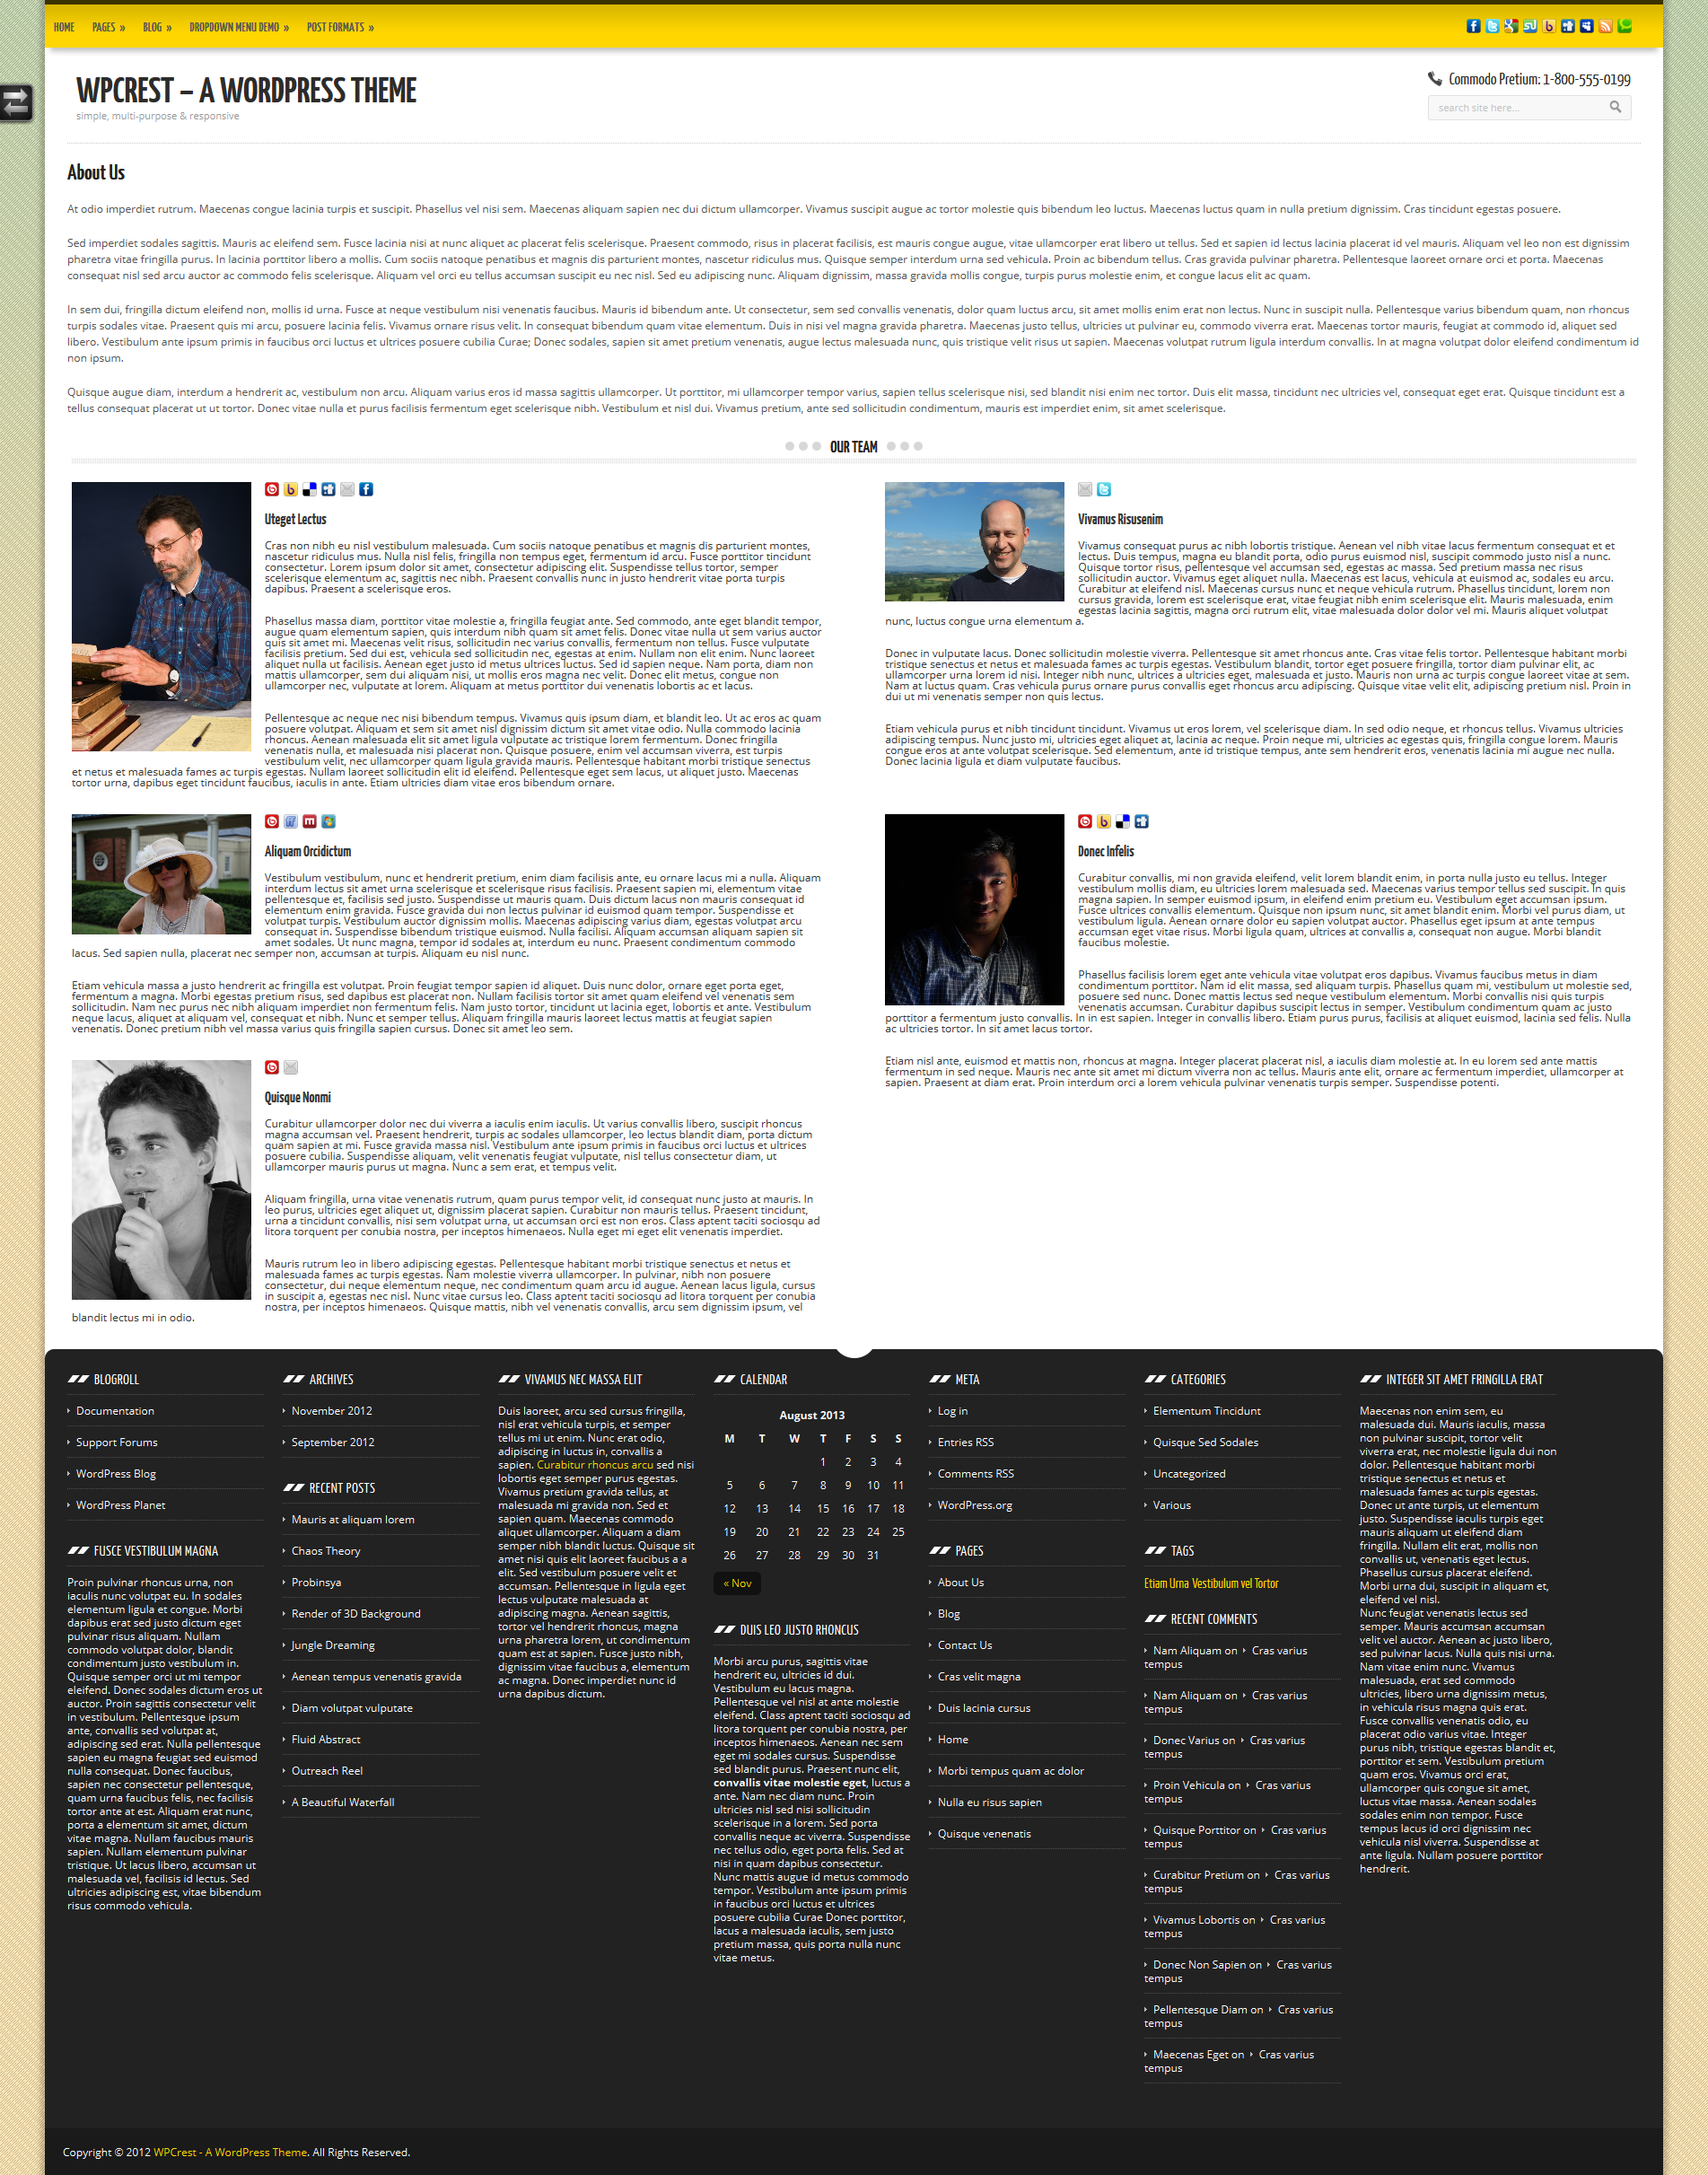
- About Page with Members section
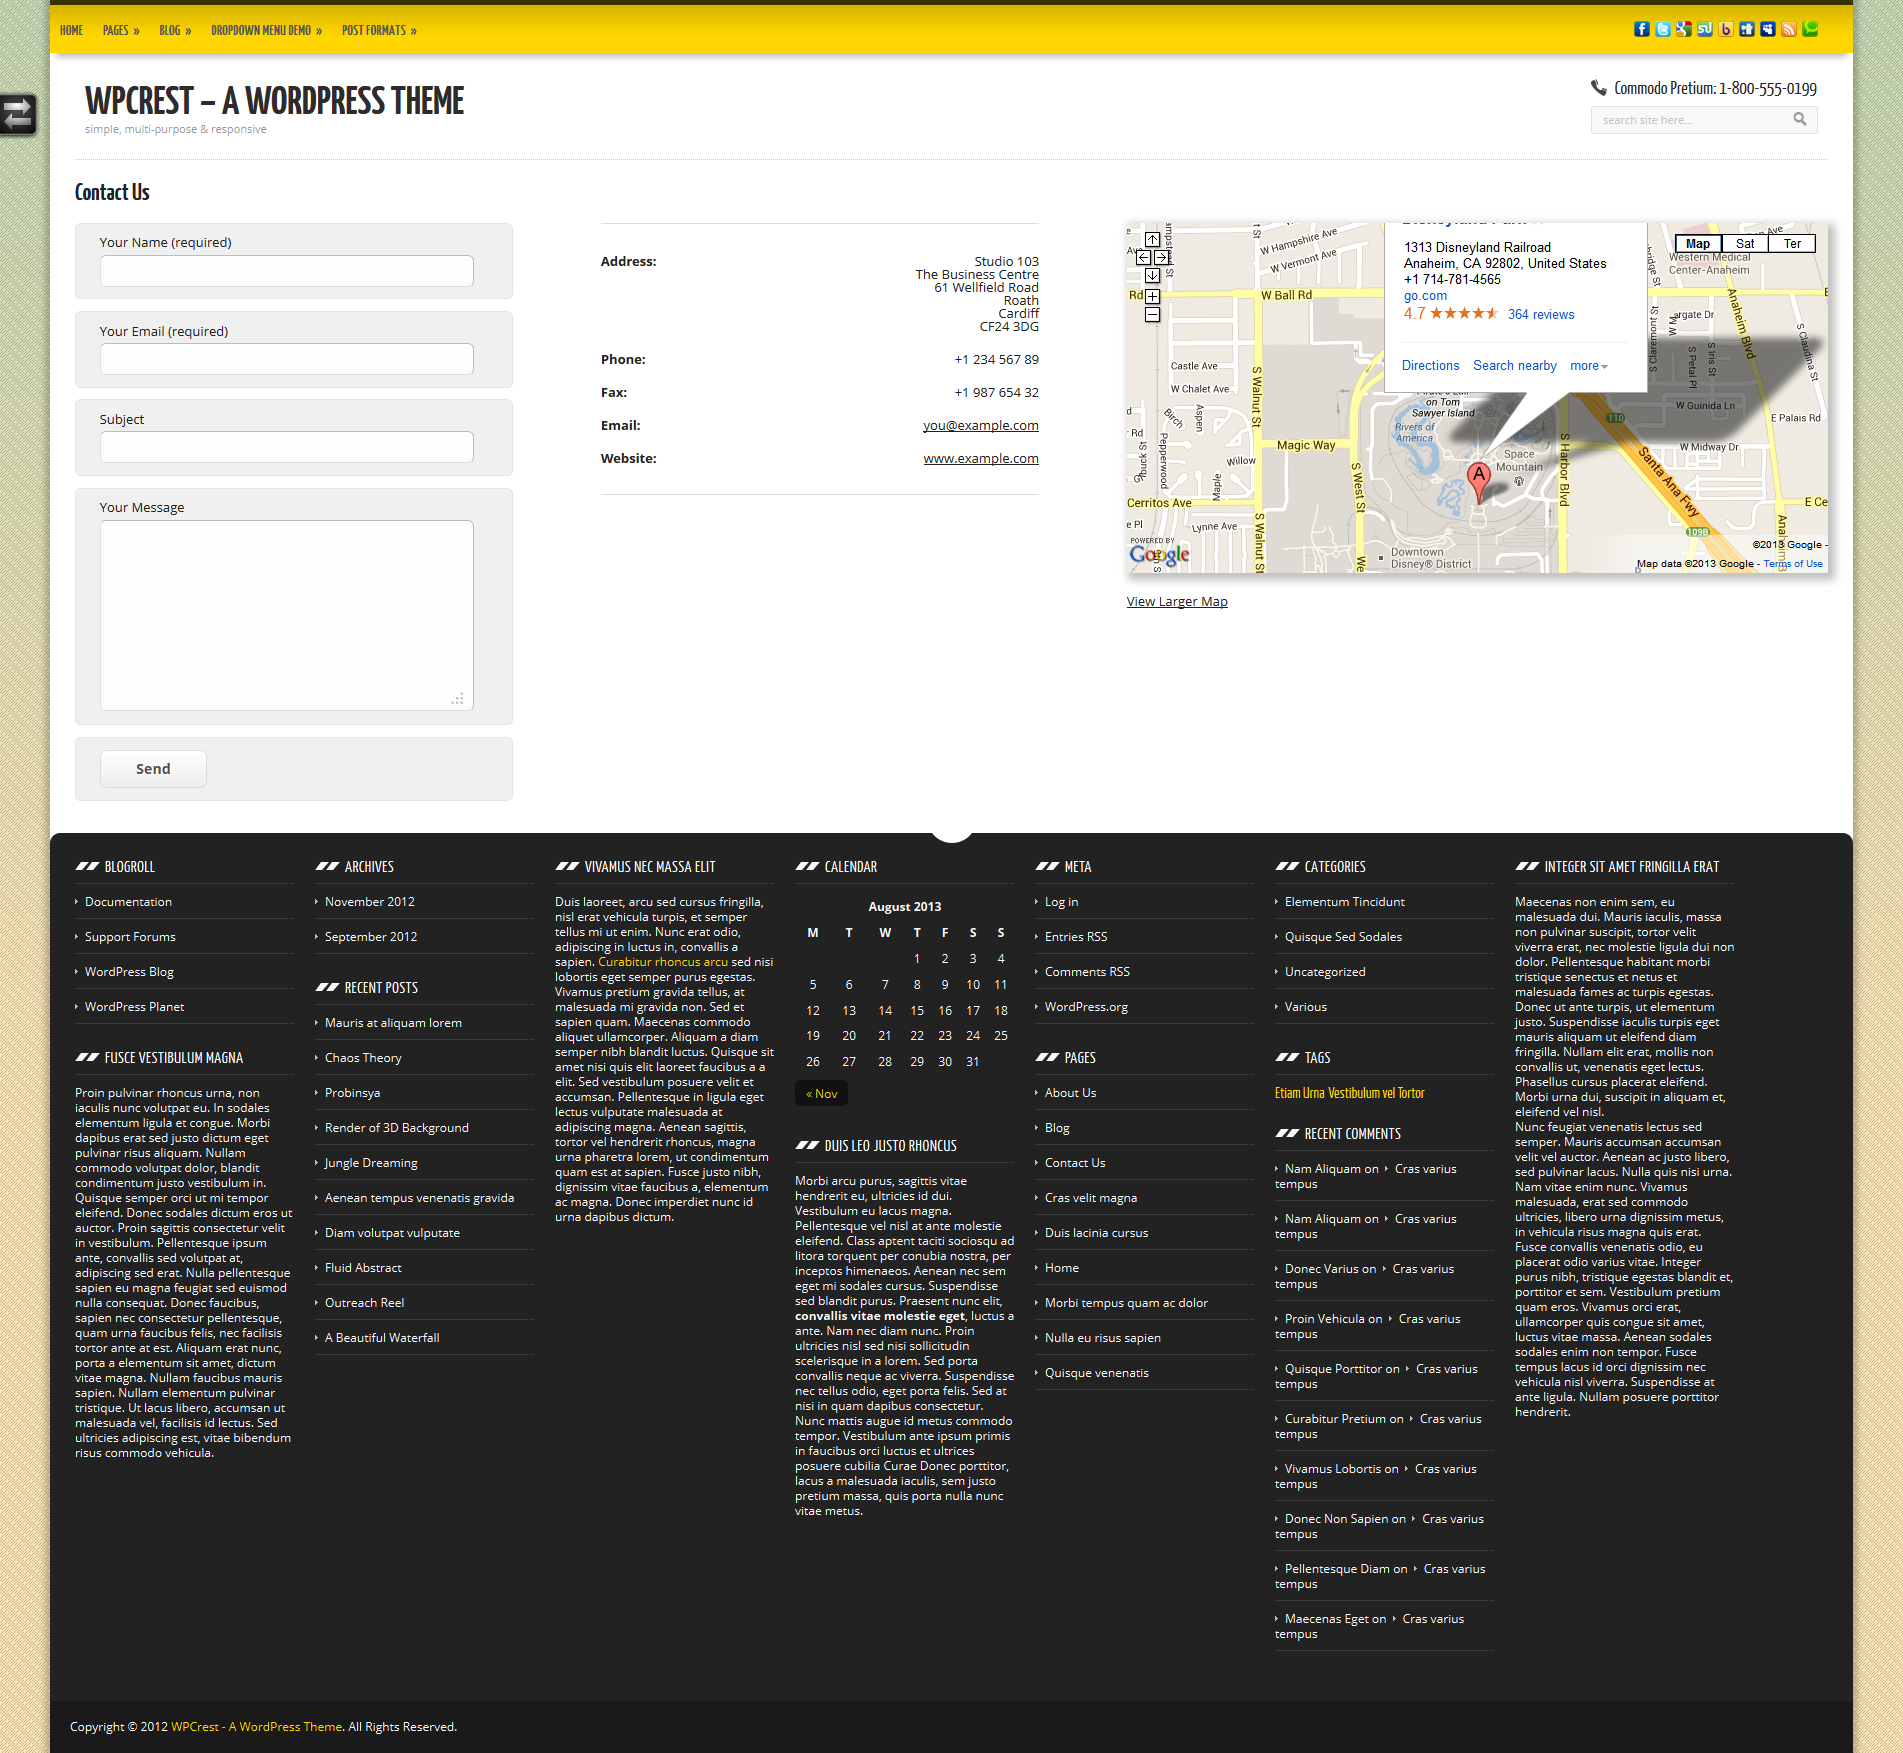
- Contact Page
- A Scheme Switcher which lets visitor switch the skin in use and the background images. Also lets the user increase or decrease the font size
- A Social Media links section
- A User Support block which you can use to display your contact number or email address
- A Preloader that can be displayed while a page loads and while AJAX calls are being executed
- Ability to modify all Headings, Labels, URL Slugs and Messages
- Site-wide bottom widget panel
- Widgetized sidebar for blog section
- Ability to replace text logo/description with a logo. Also lets you upload your logo right from the backend.
For Designers and Developers
- Full Localization Support (which means you can translate the text visible on the frontend and backend for Non-English users)
- Ability to load custom PHP, CSS and JavaScript without modifying any of the core theme files.
- Fully supports creation of Child Themes
Frontend Demonstration
Here are links to a demo installation which let you see all sections of the theme.
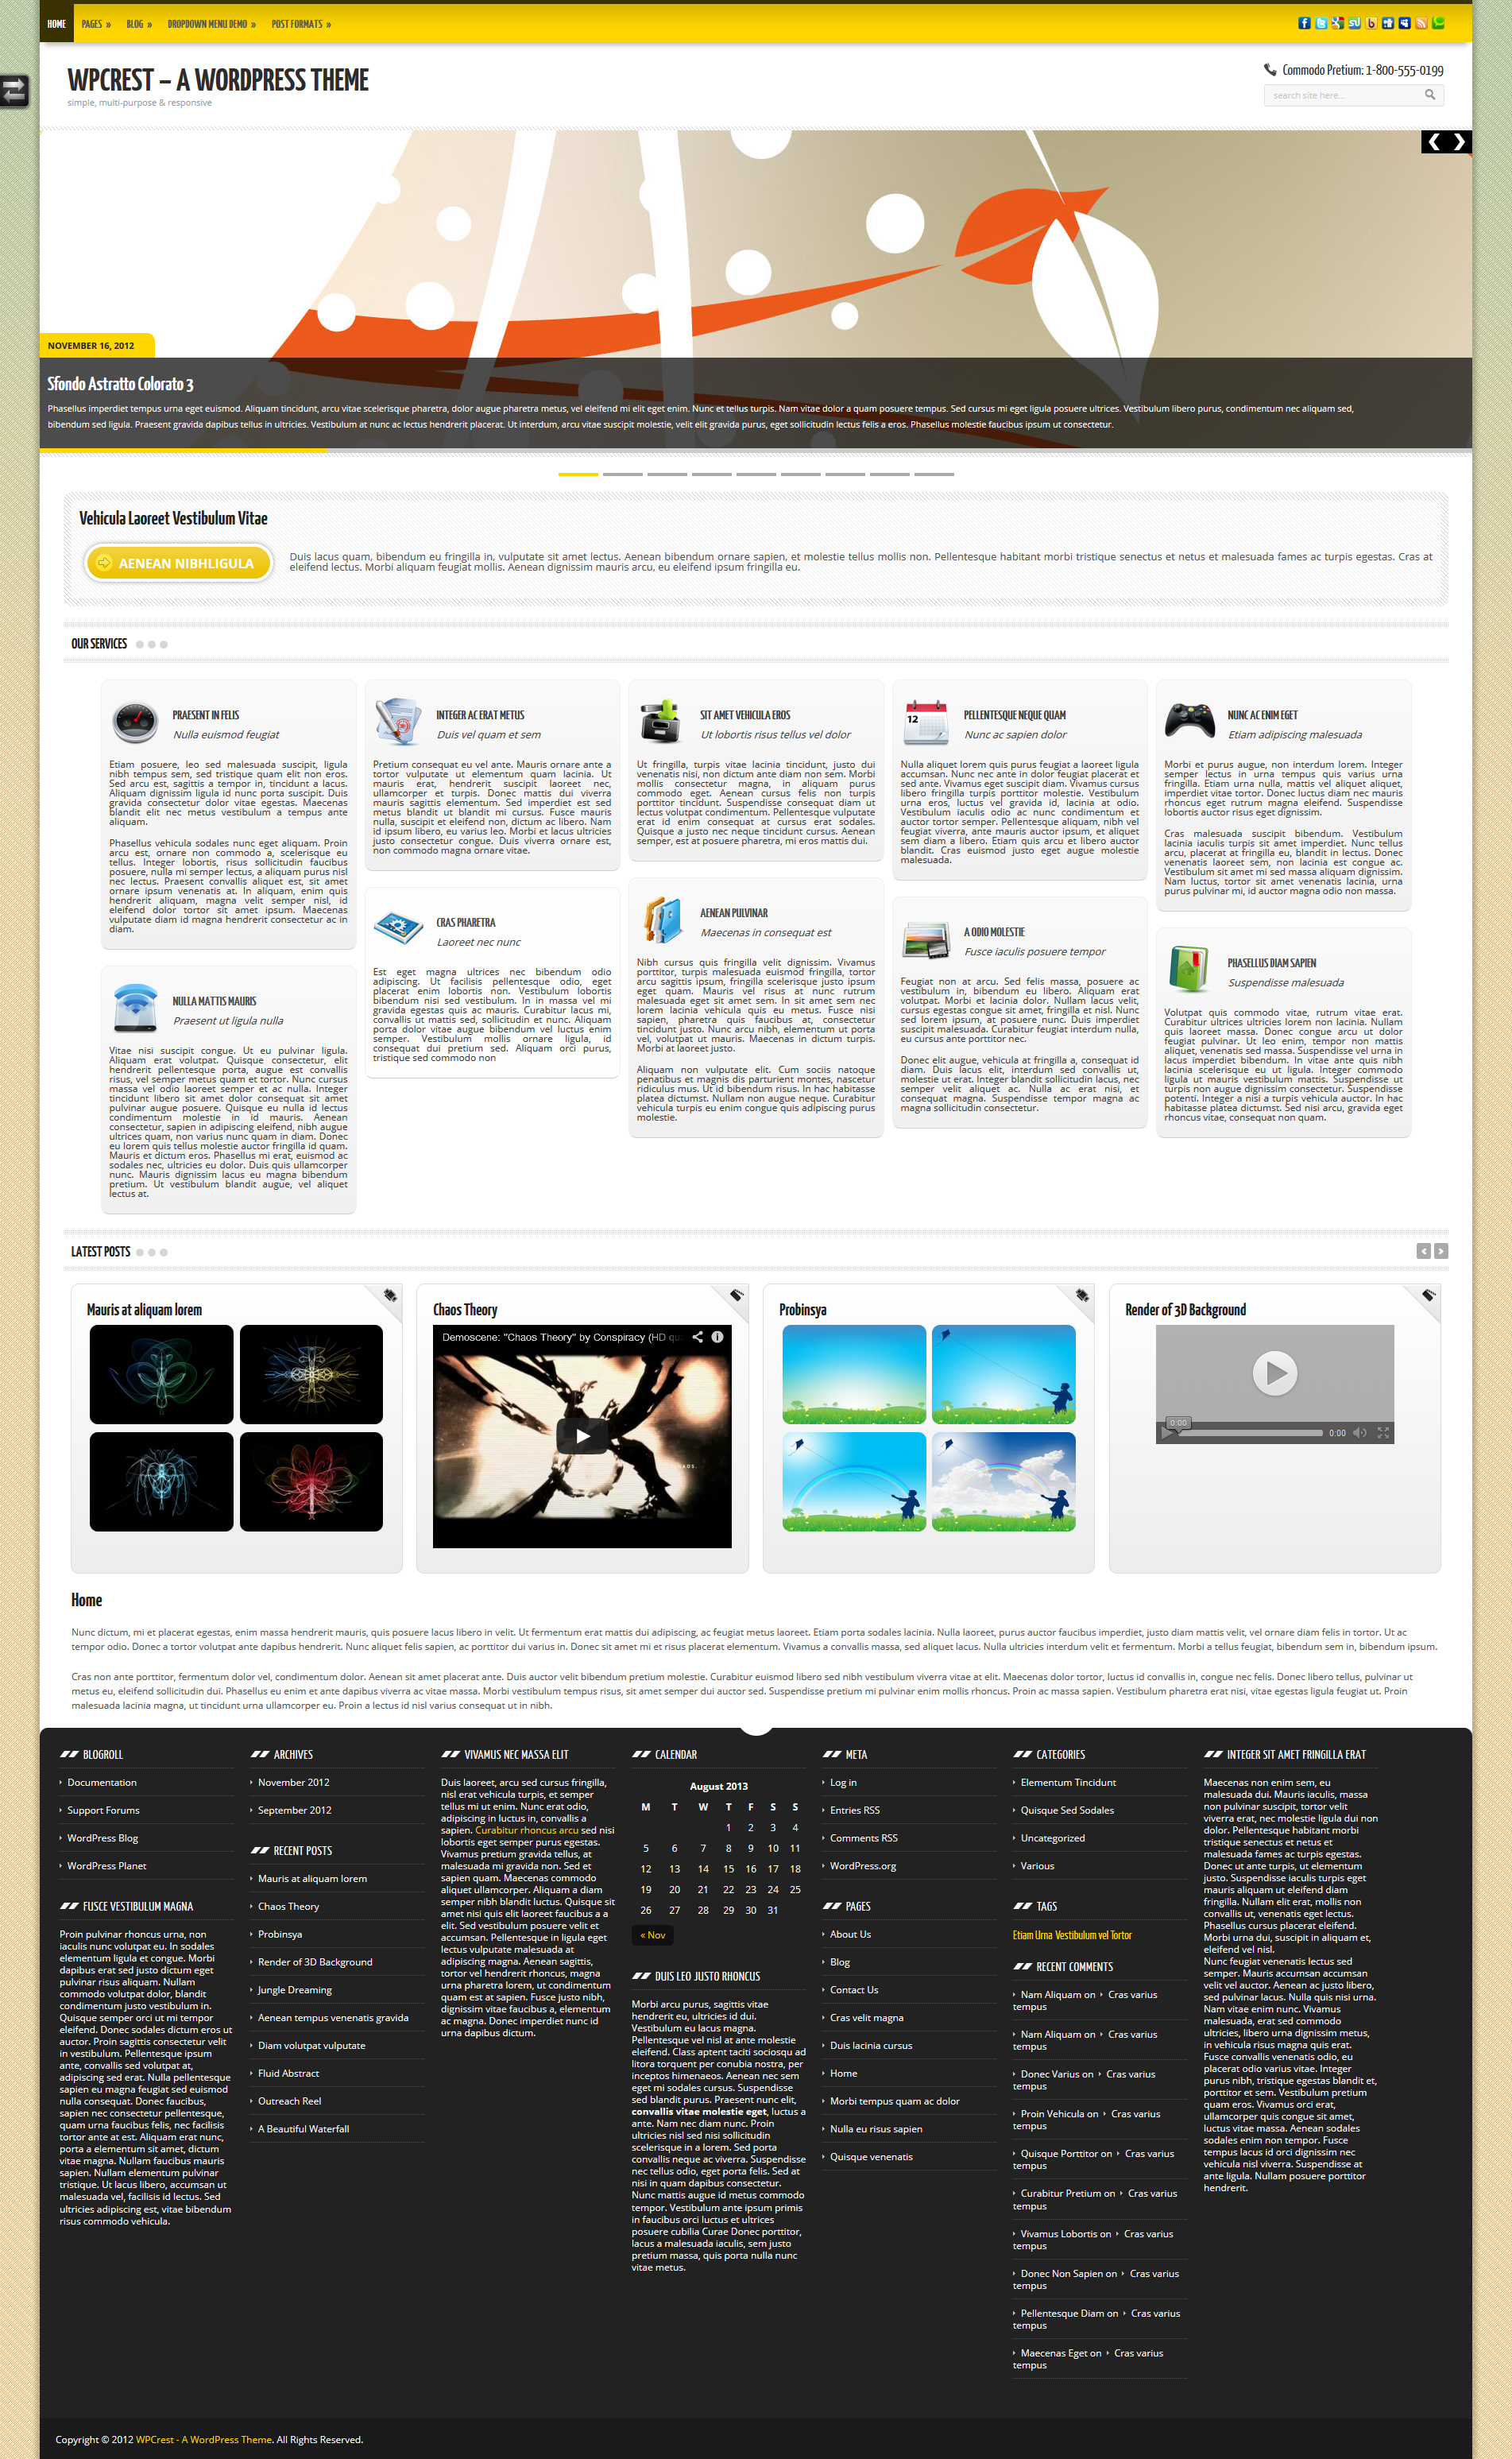
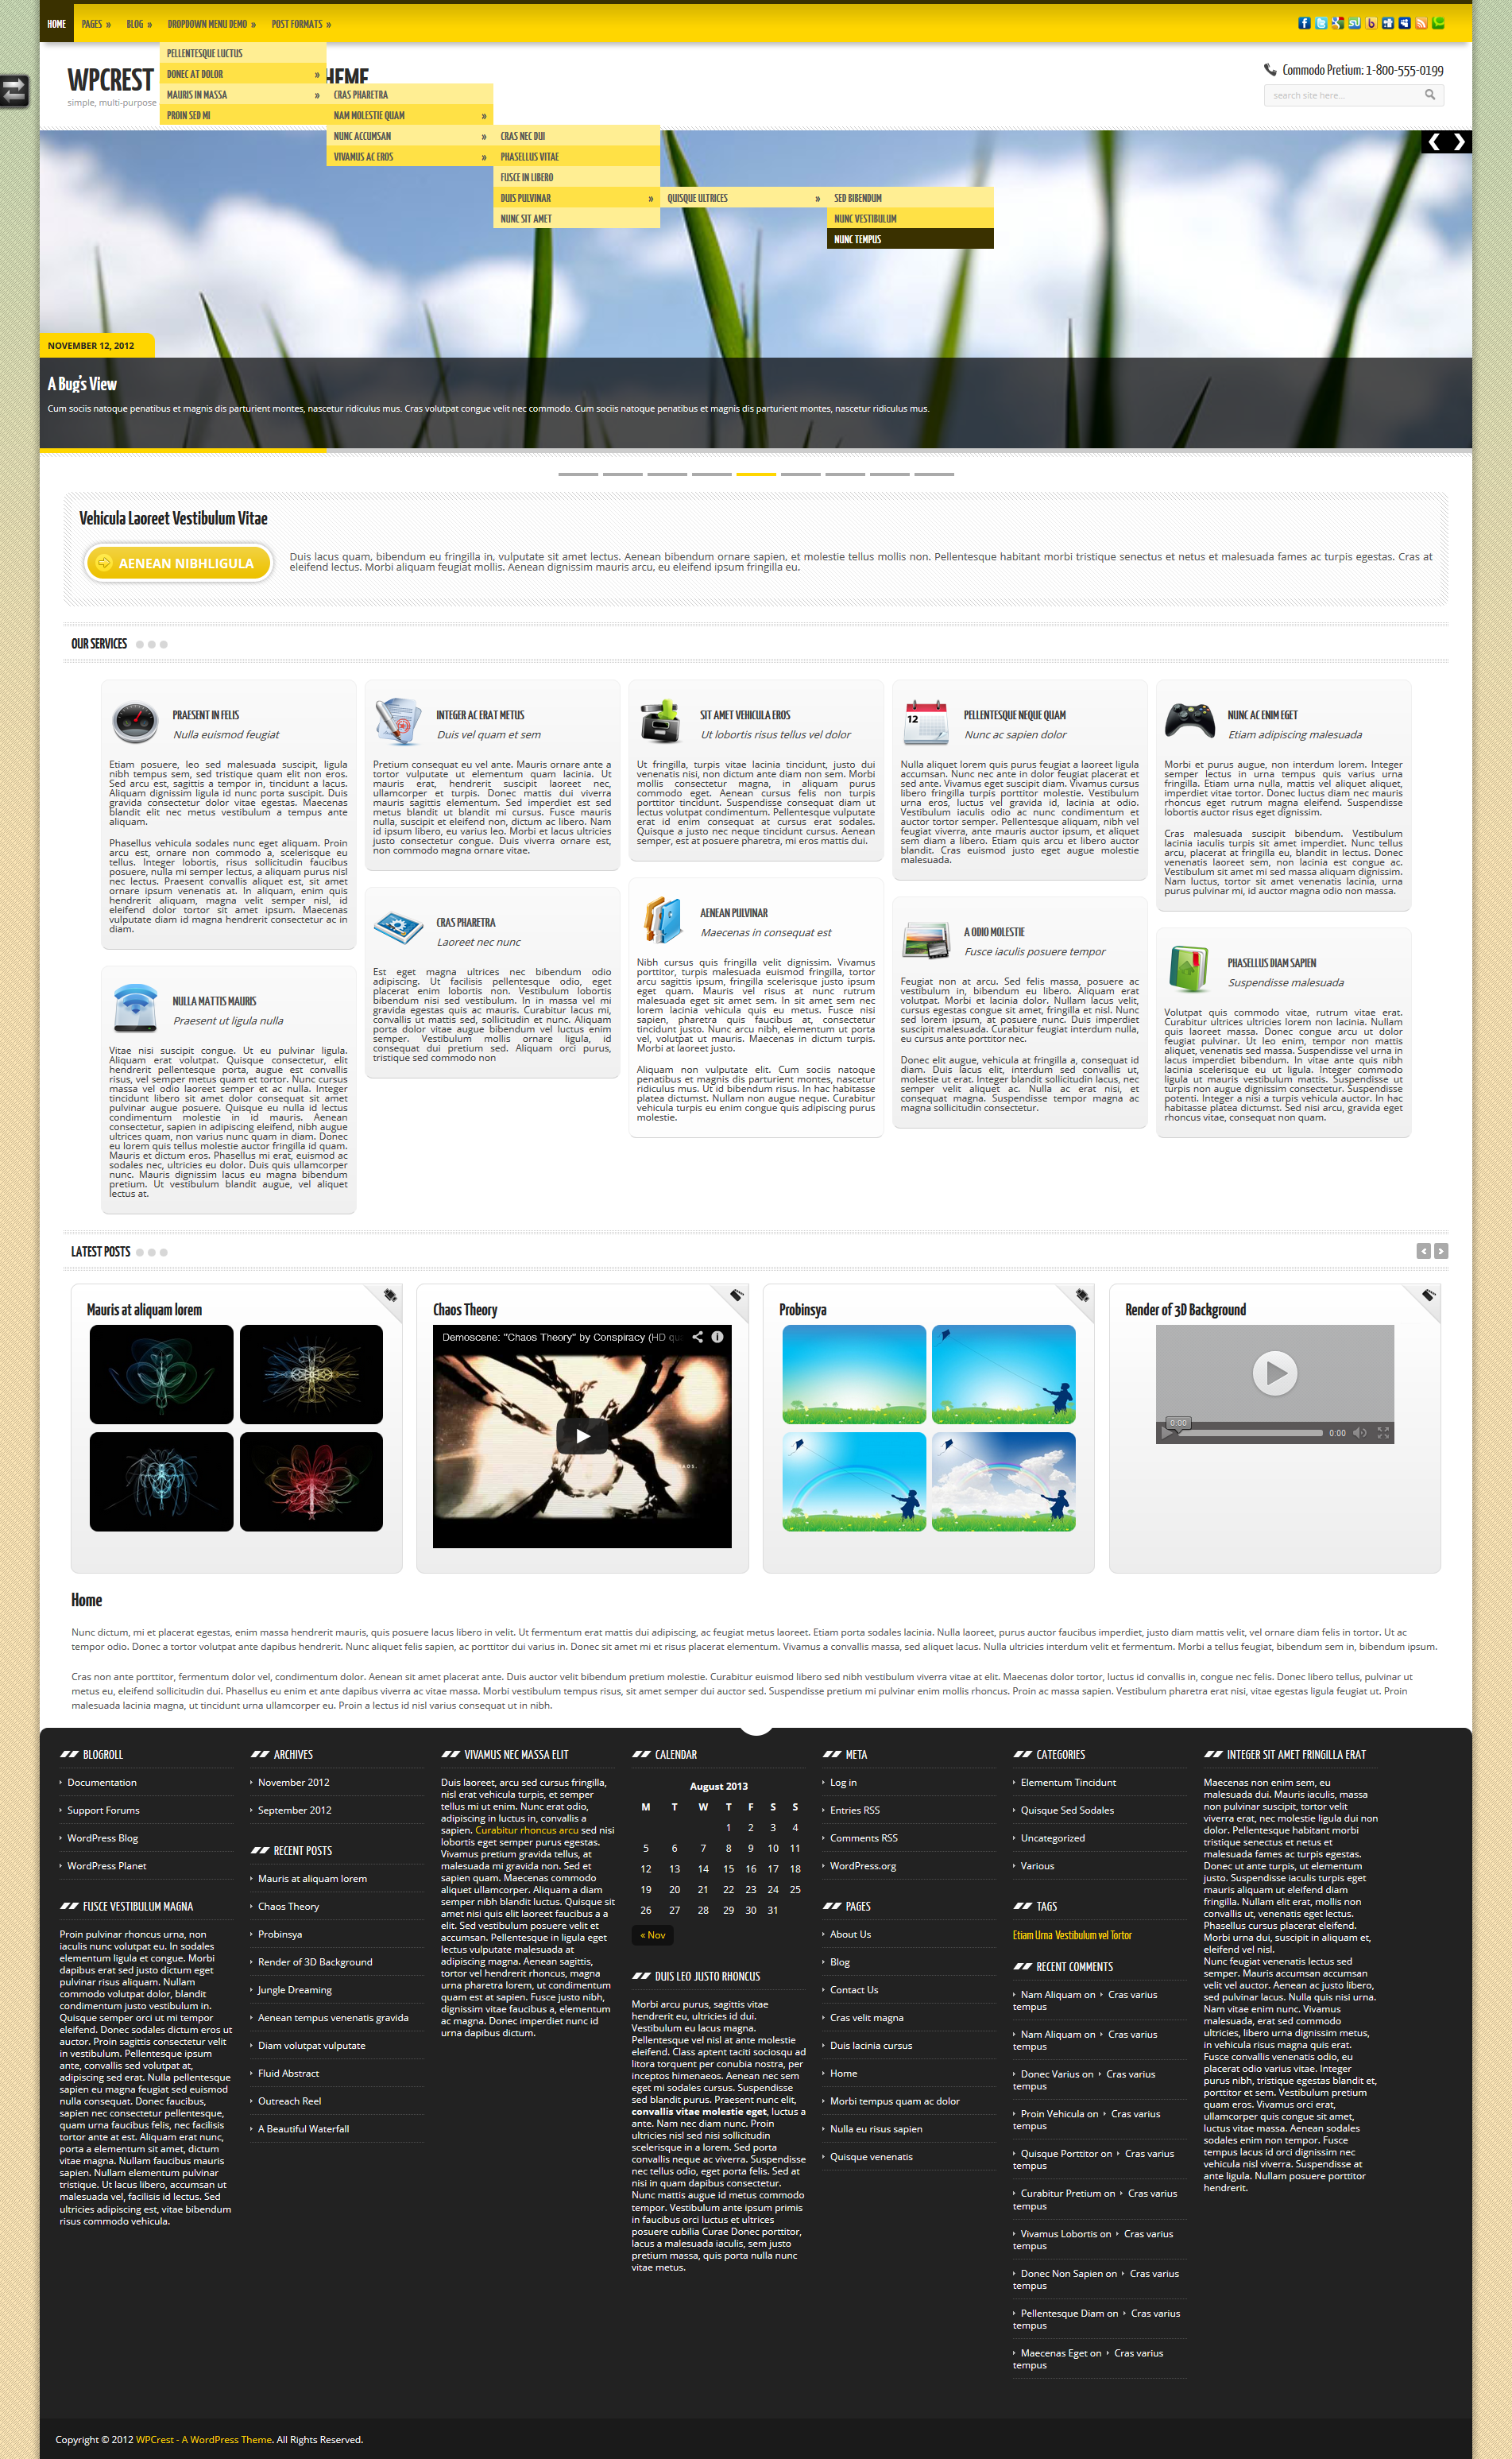
Homepage: http://demo.rhyzz.com/wordpress/wpcrest/
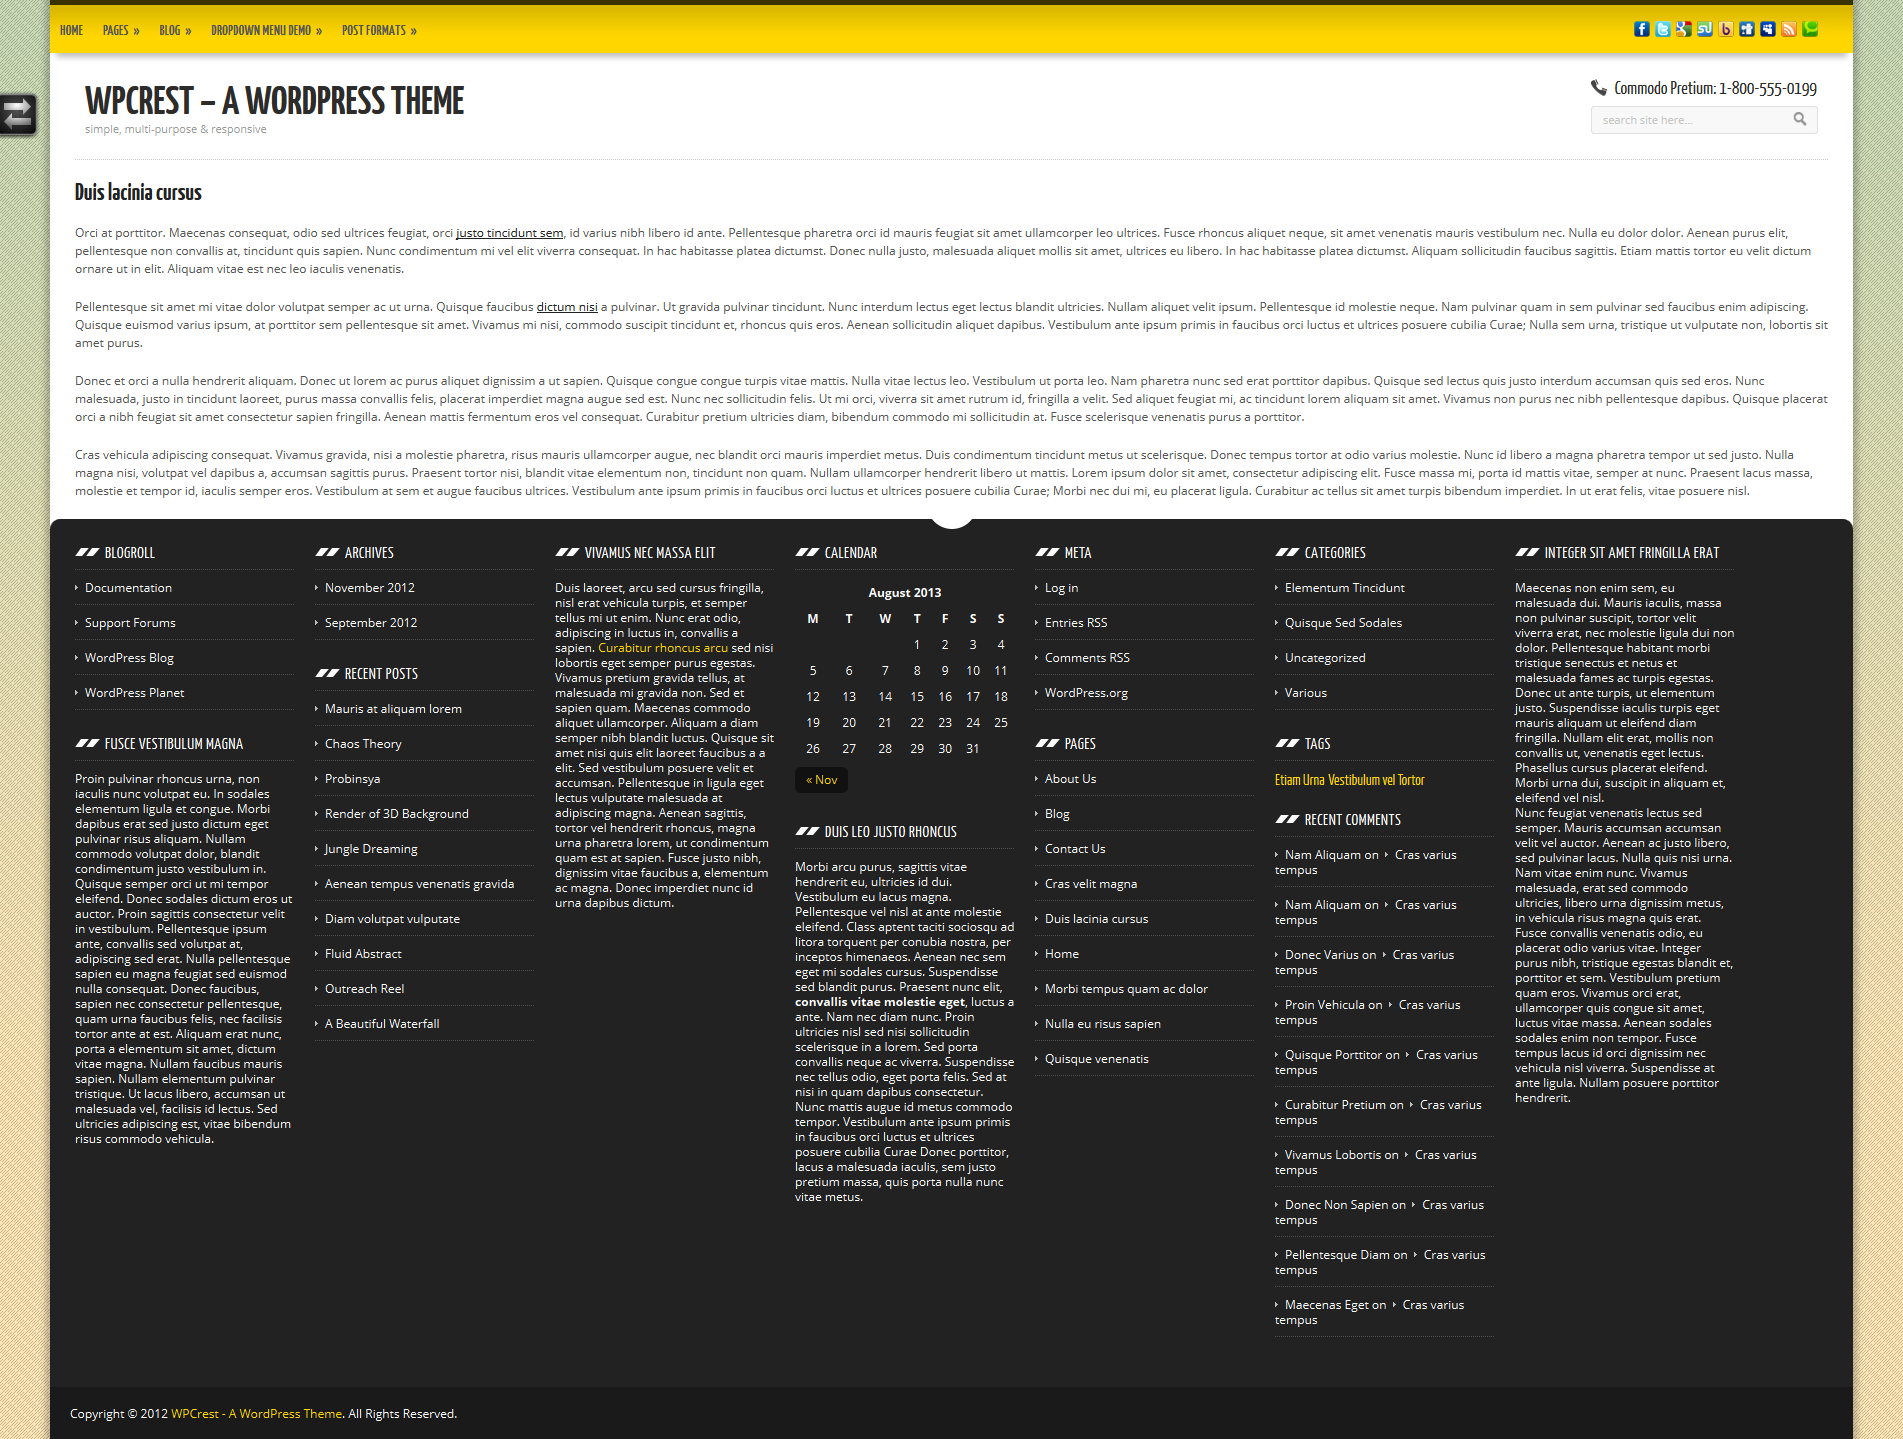
A Static Page: http://demo.rhyzz.com/wordpress/wpcrest/duis-lacinia-cursus/
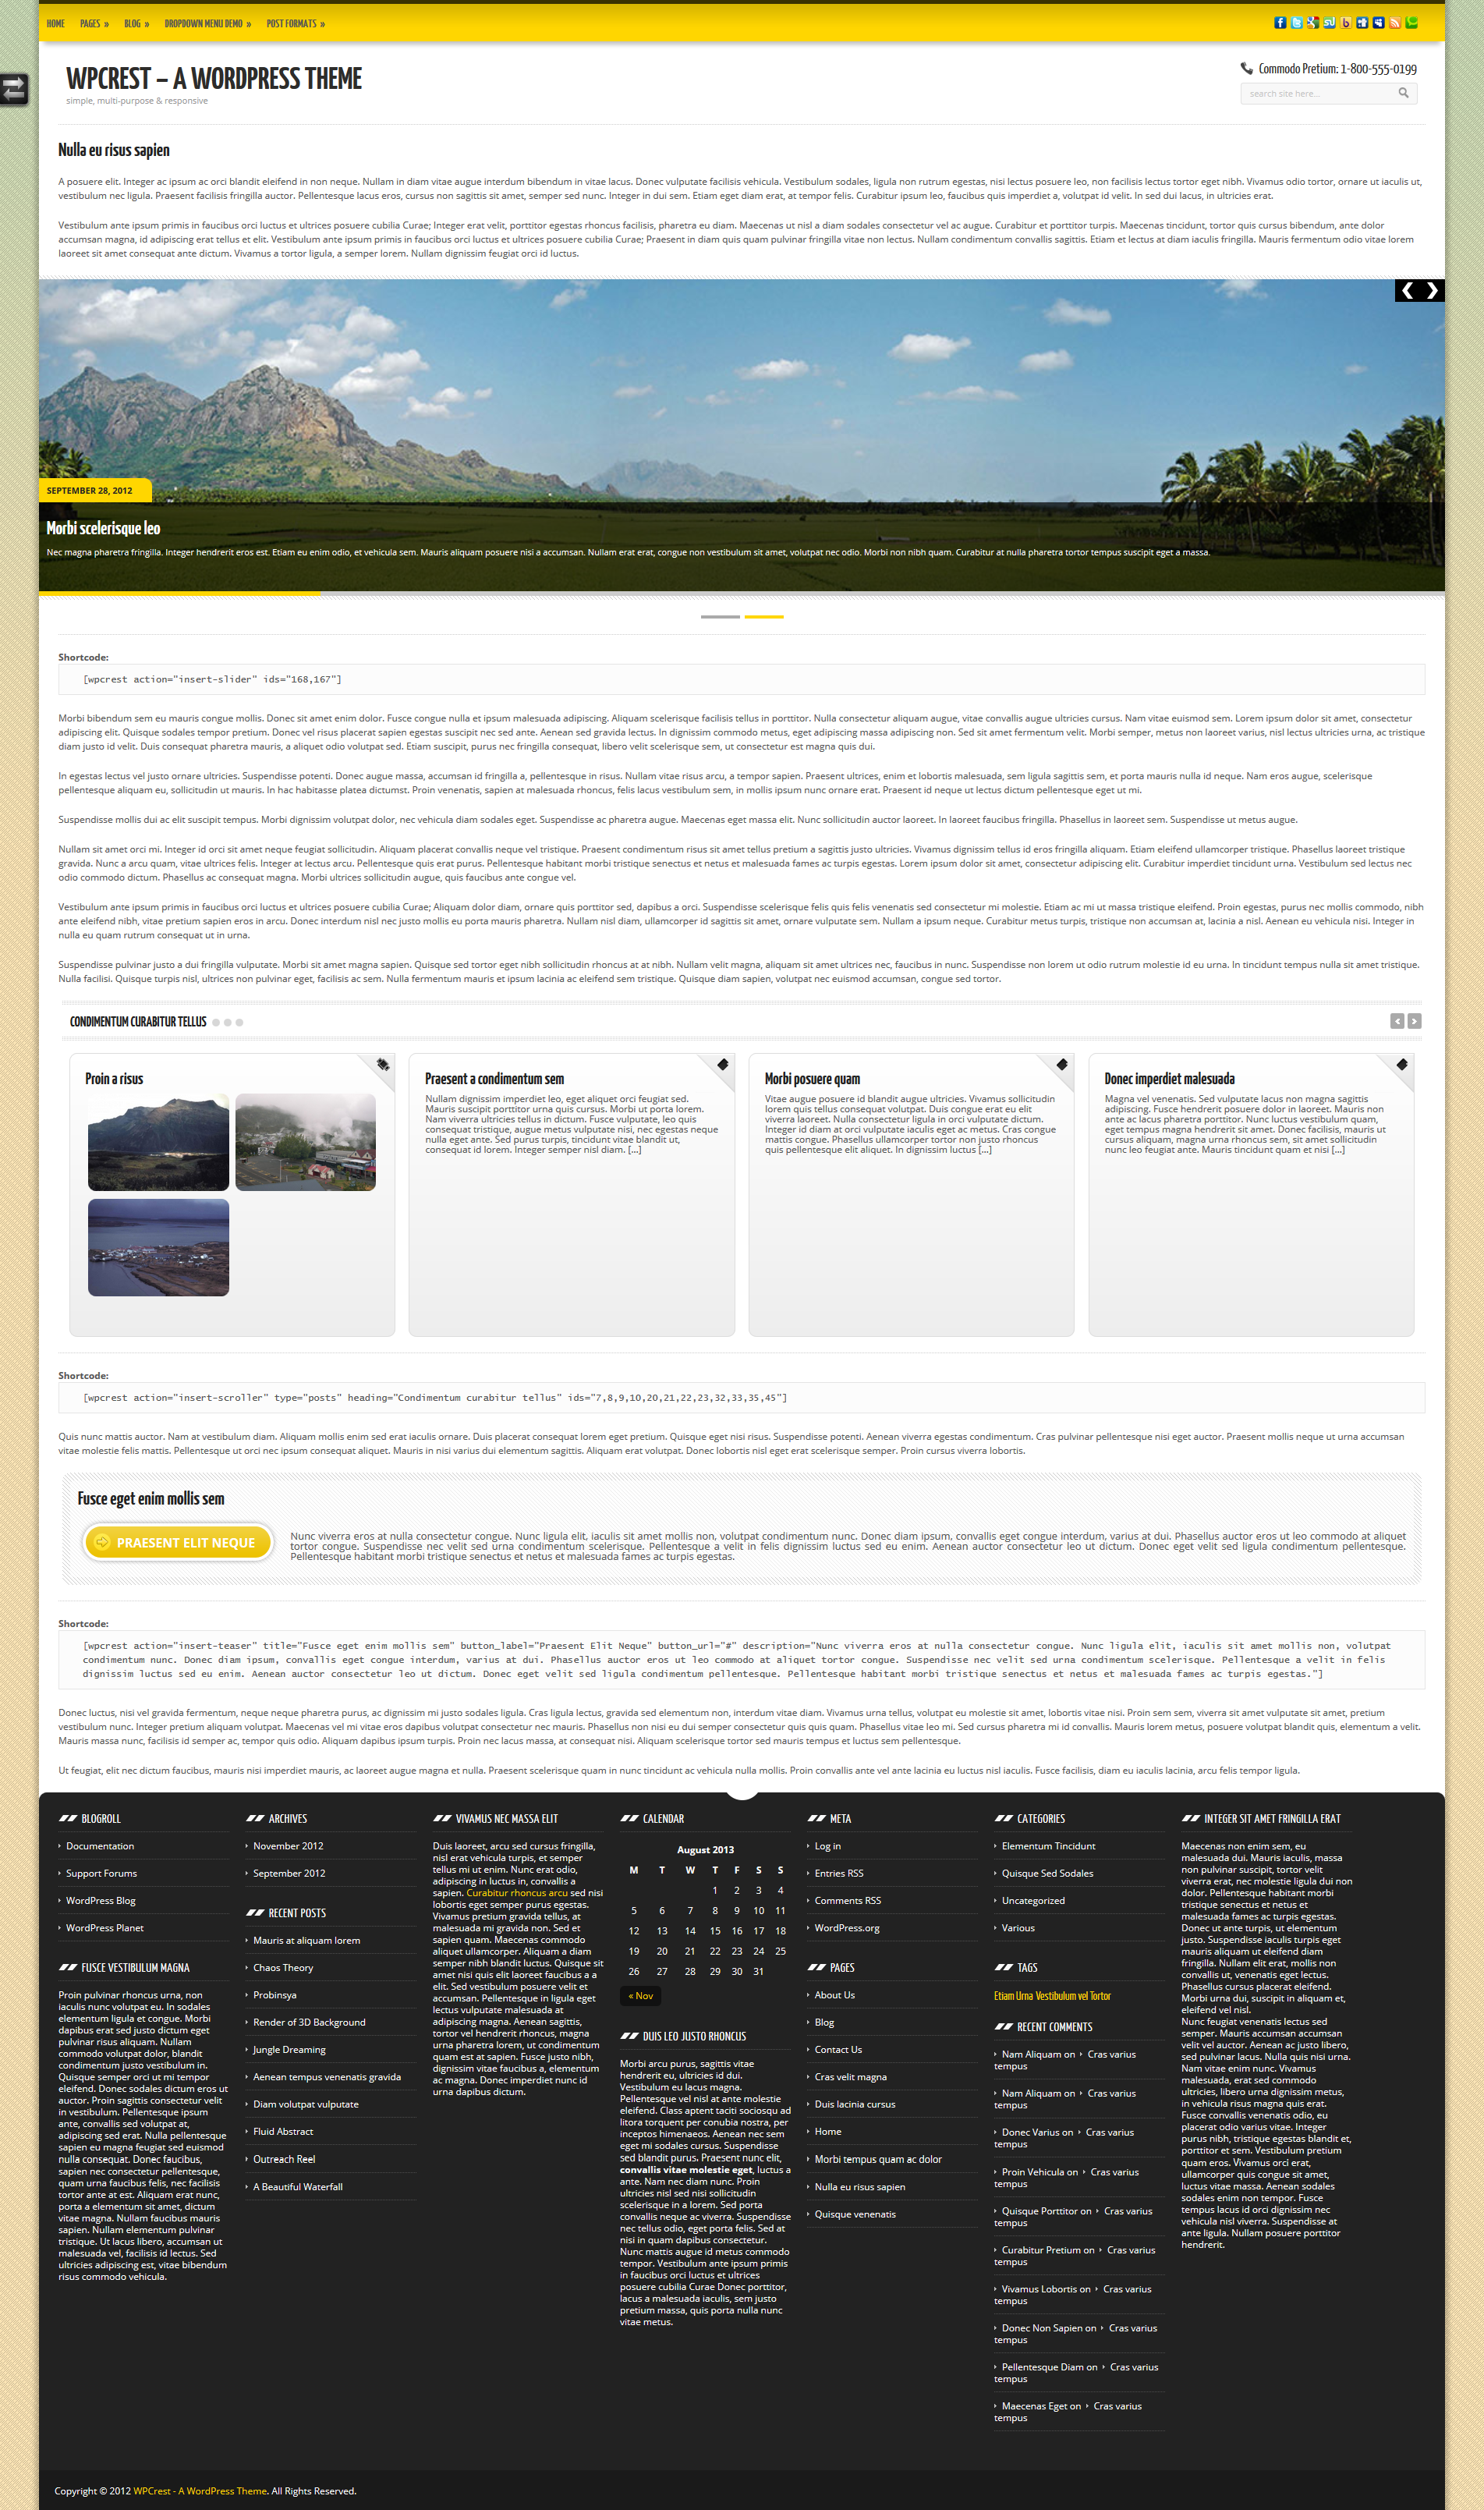
Page with a Custom Slider, Scroller and Teaser: http://demo.rhyzz.com/wordpress/wpcrest/nulla-eu-risus-sapien/
A Category with no paging: http://demo.rhyzz.com/wordpress/wpcrest/category/elementum-tincidunt/
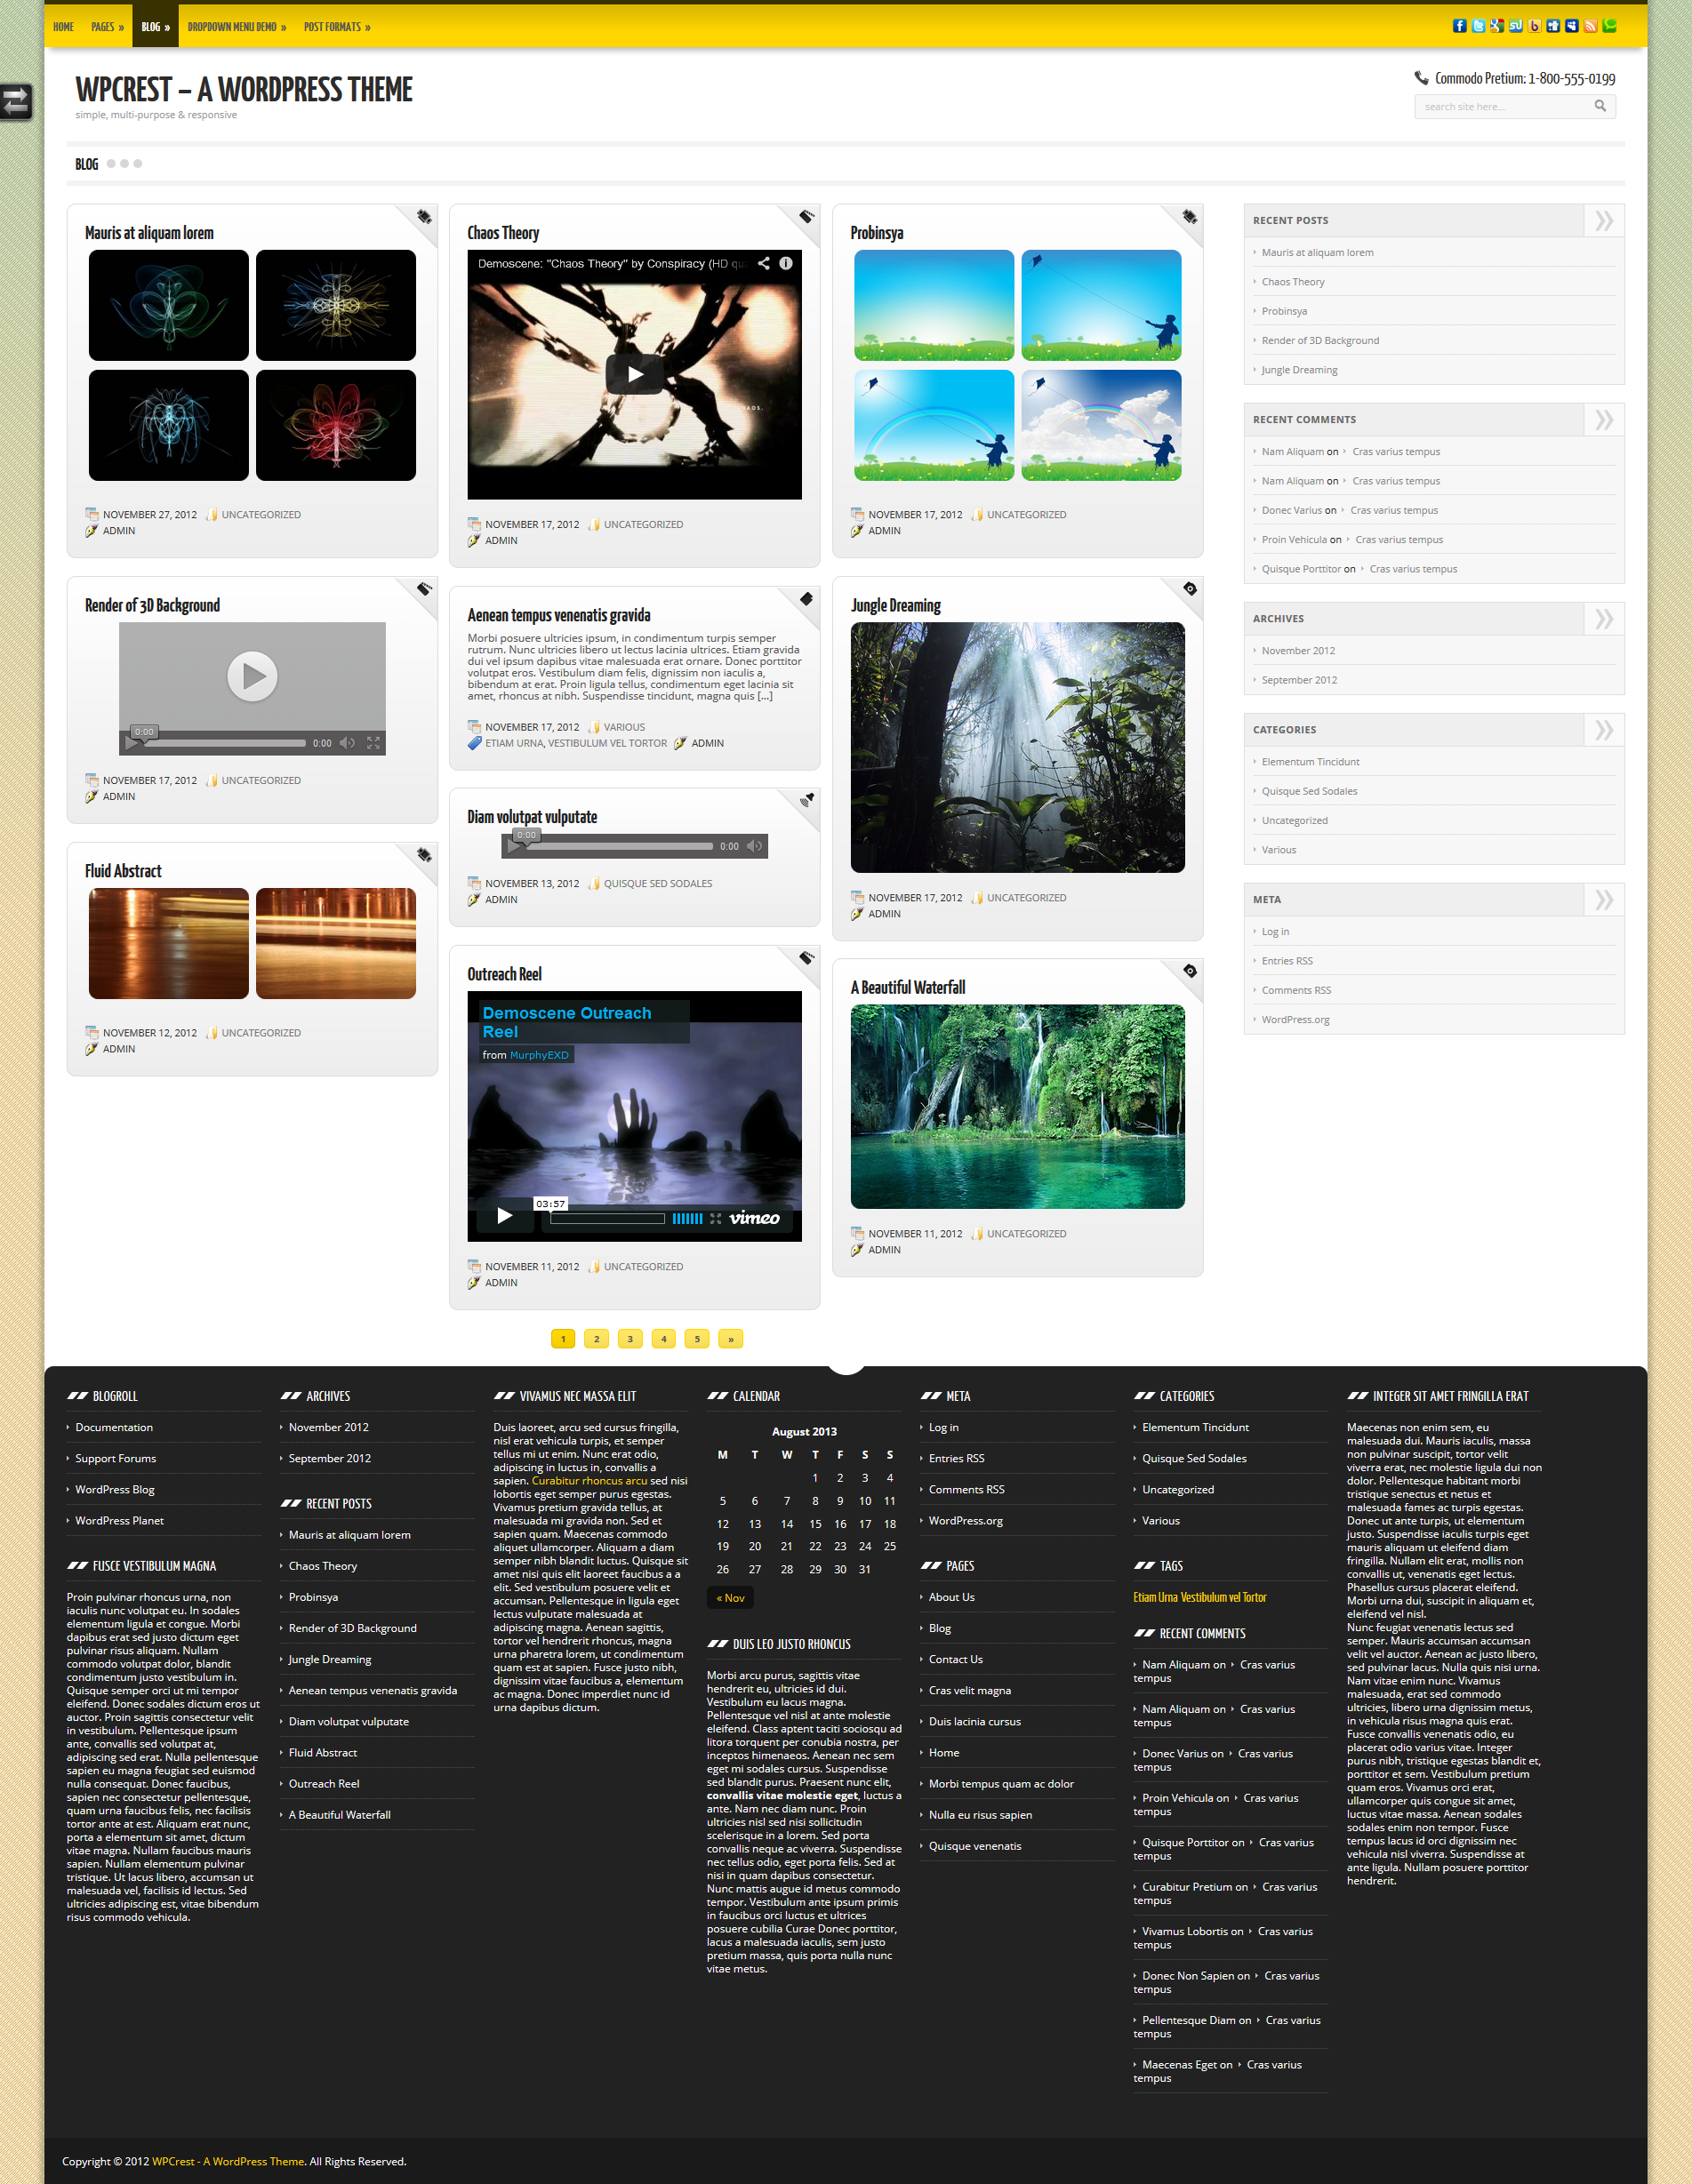
A Category with paging: http://demo.rhyzz.com/wordpress/wpcrest/category/quisque-sed-sodales/
A Post with an Image: http://demo.rhyzz.com/wordpress/wpcrest/suscipit-sit-amet/
Another Post with an Image: http://demo.rhyzz.com/wordpress/wpcrest/donec-dignissim-blandit-eros/
A Simple Post: http://demo.rhyzz.com/wordpress/wpcrest/integer-sit-amet-arcu/
A Post with a Video: http://demo.rhyzz.com/wordpress/wpcrest/vivamus-nec-ligula-massa/
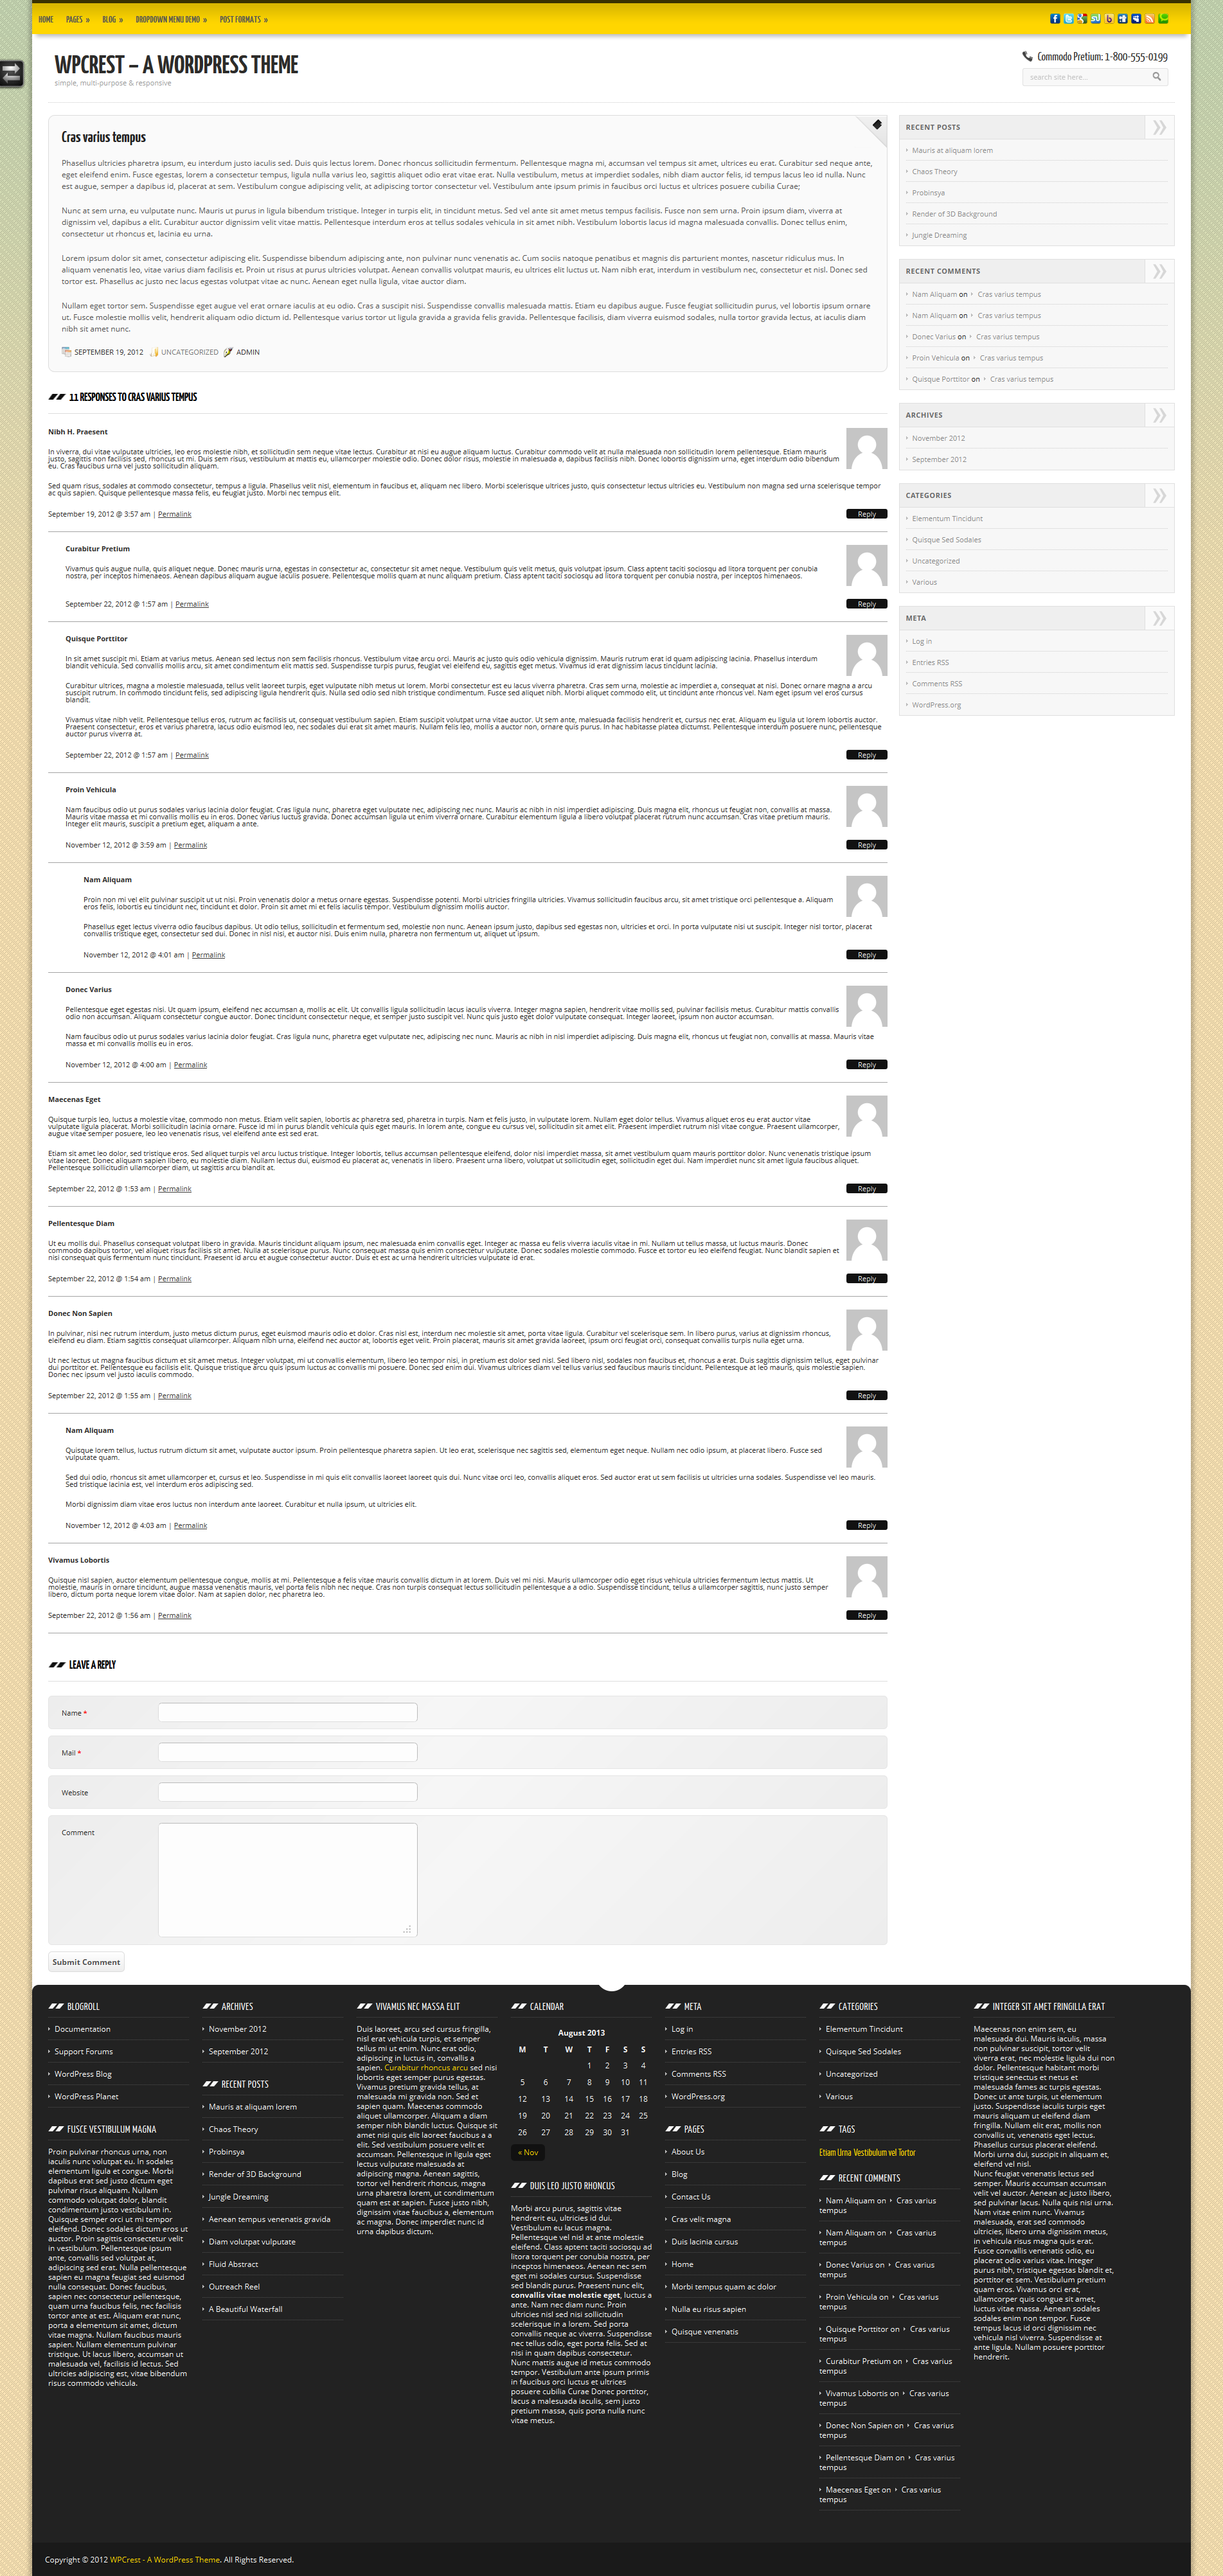
A Post with Comments: http://demo.rhyzz.com/wordpress/wpcrest/cras-varius-tempus/#comments
A Post with Many Things: http://demo.rhyzz.com/wordpress/wpcrest/aenean-tempus-venenatis-gravida/
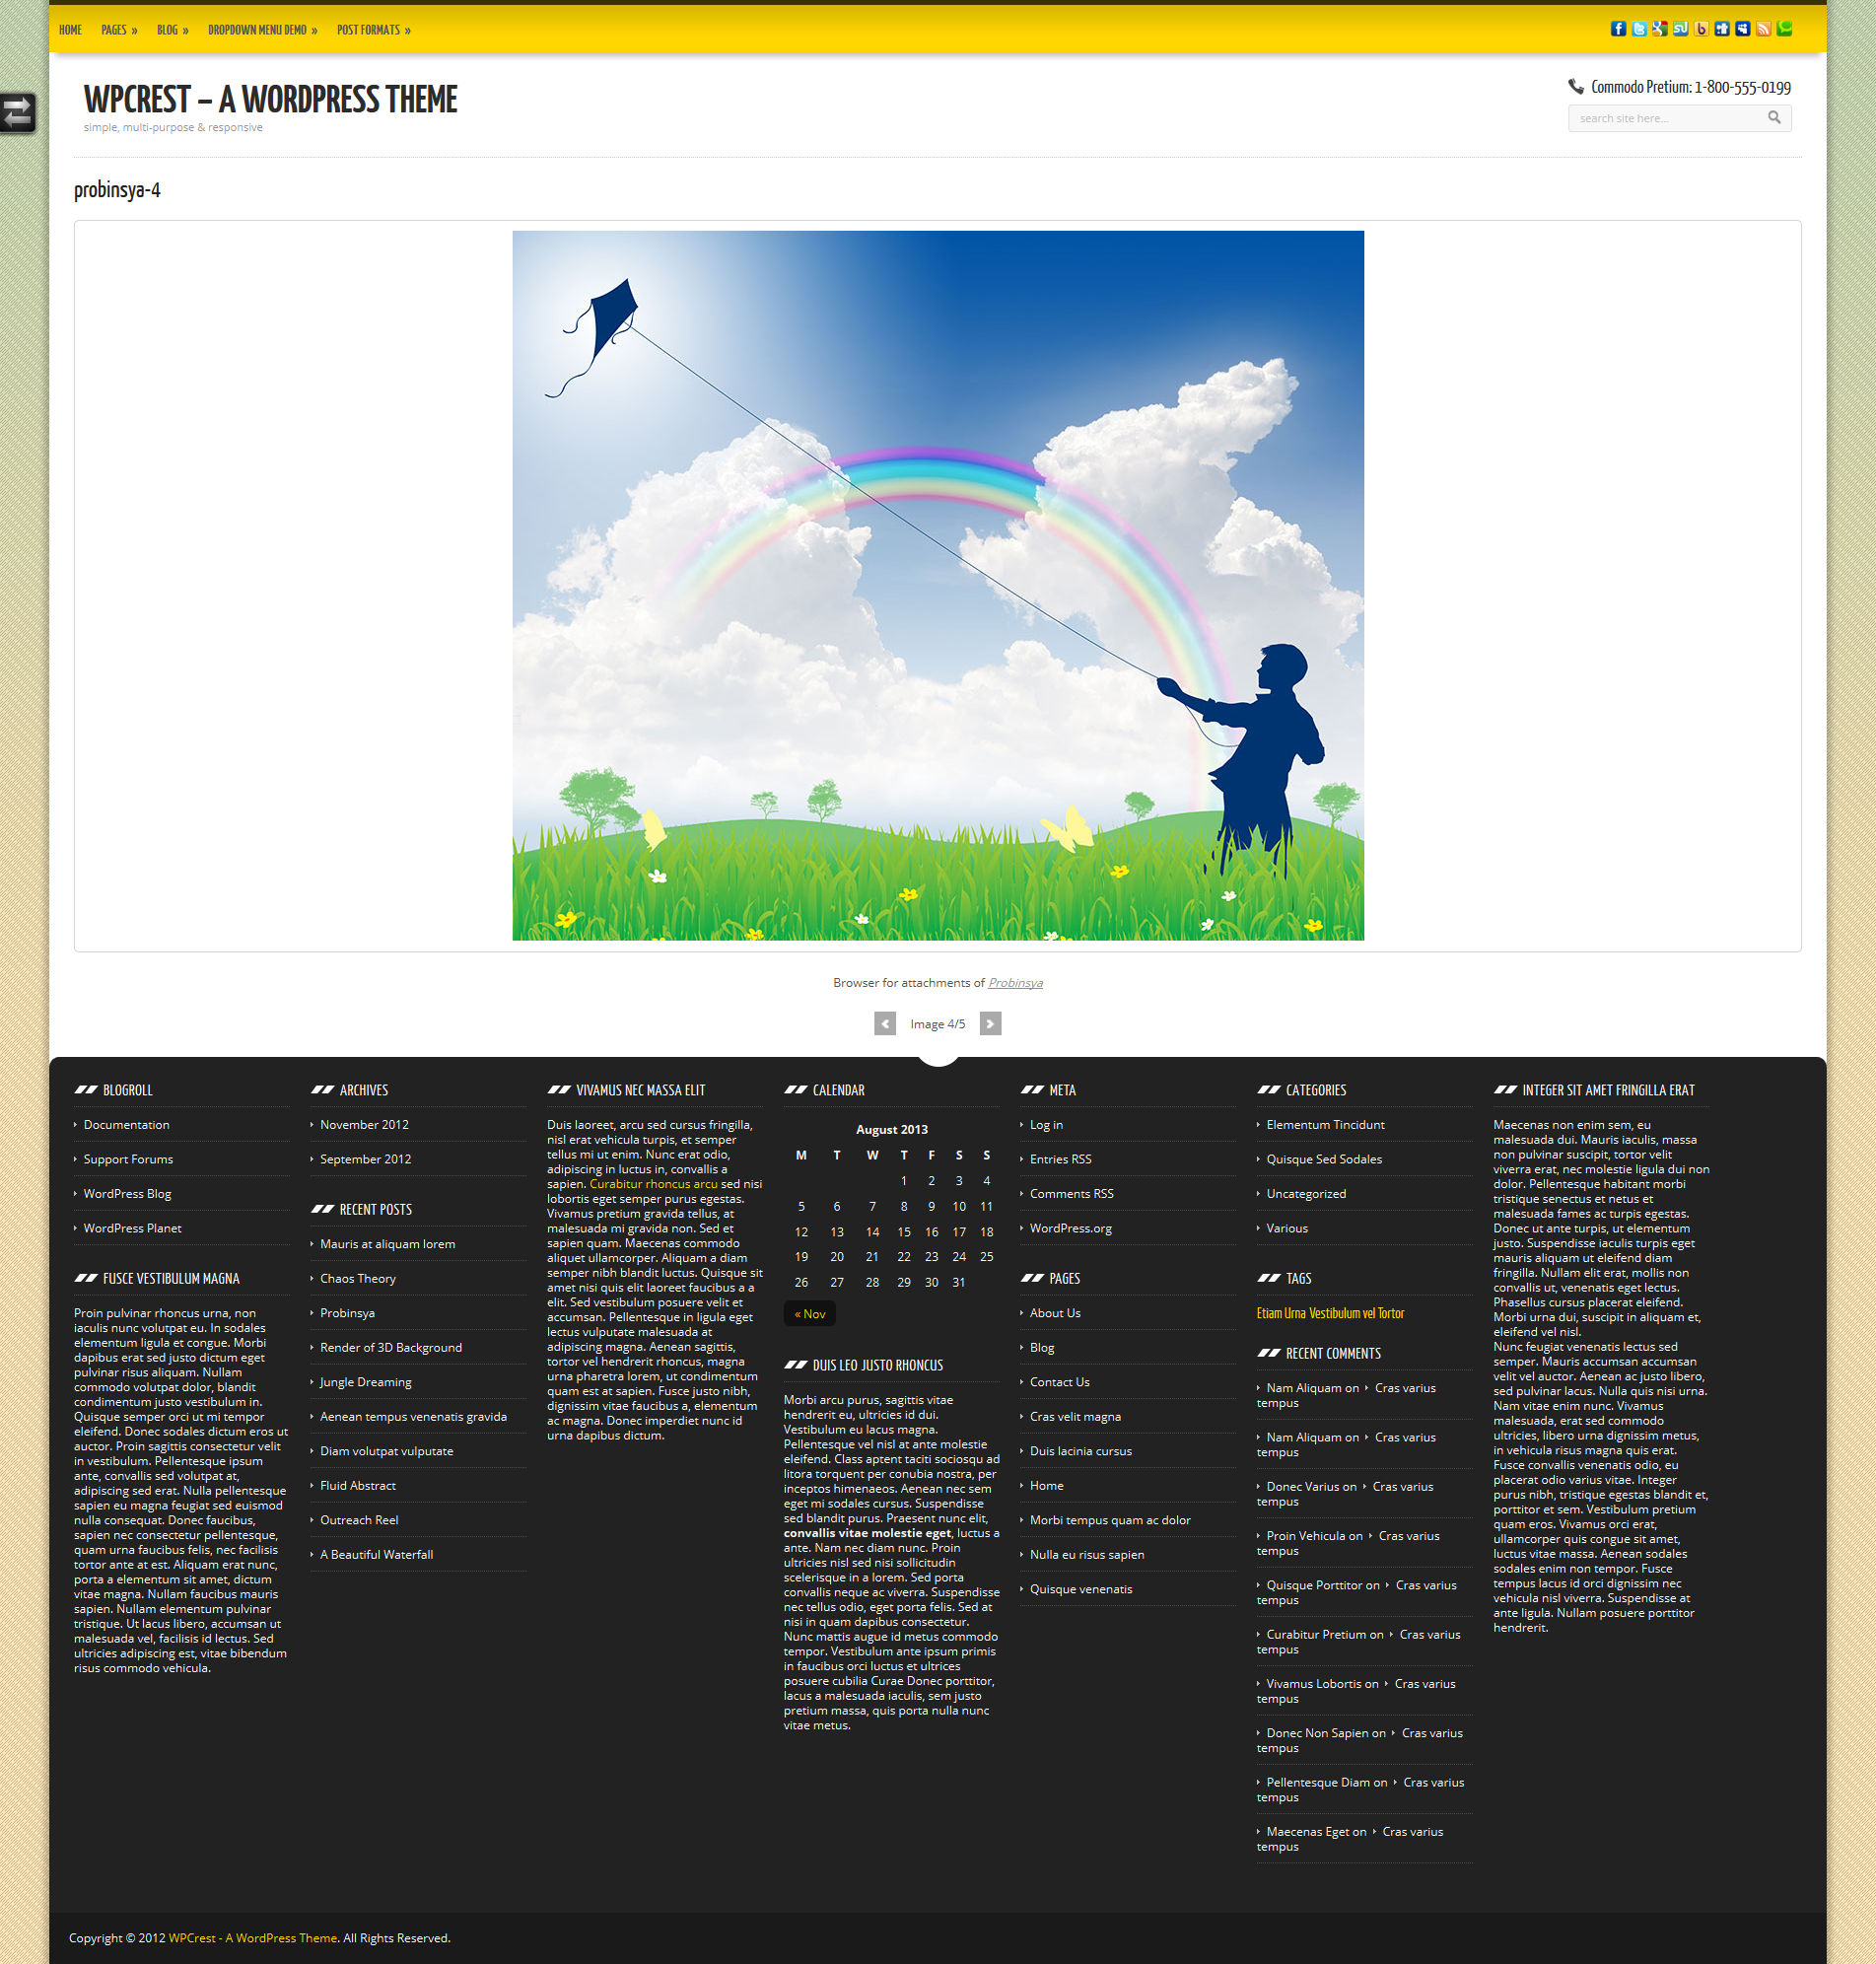
Image Attachment Page: http://demo.rhyzz.com/wordpress/wpcrest/donec-imperdiet-malesuada/yellow-shouldered-blackbird-agelaius-xanthomus-in-flight/
Image Attachment Page with links to images directly related: http://demo.rhyzz.com/wordpress/wpcrest/ligula-dapibus-vehicula/arches-9/
Search Results Page: http://demo.rhyzz.com/wordpress/wpcrest/?s=a
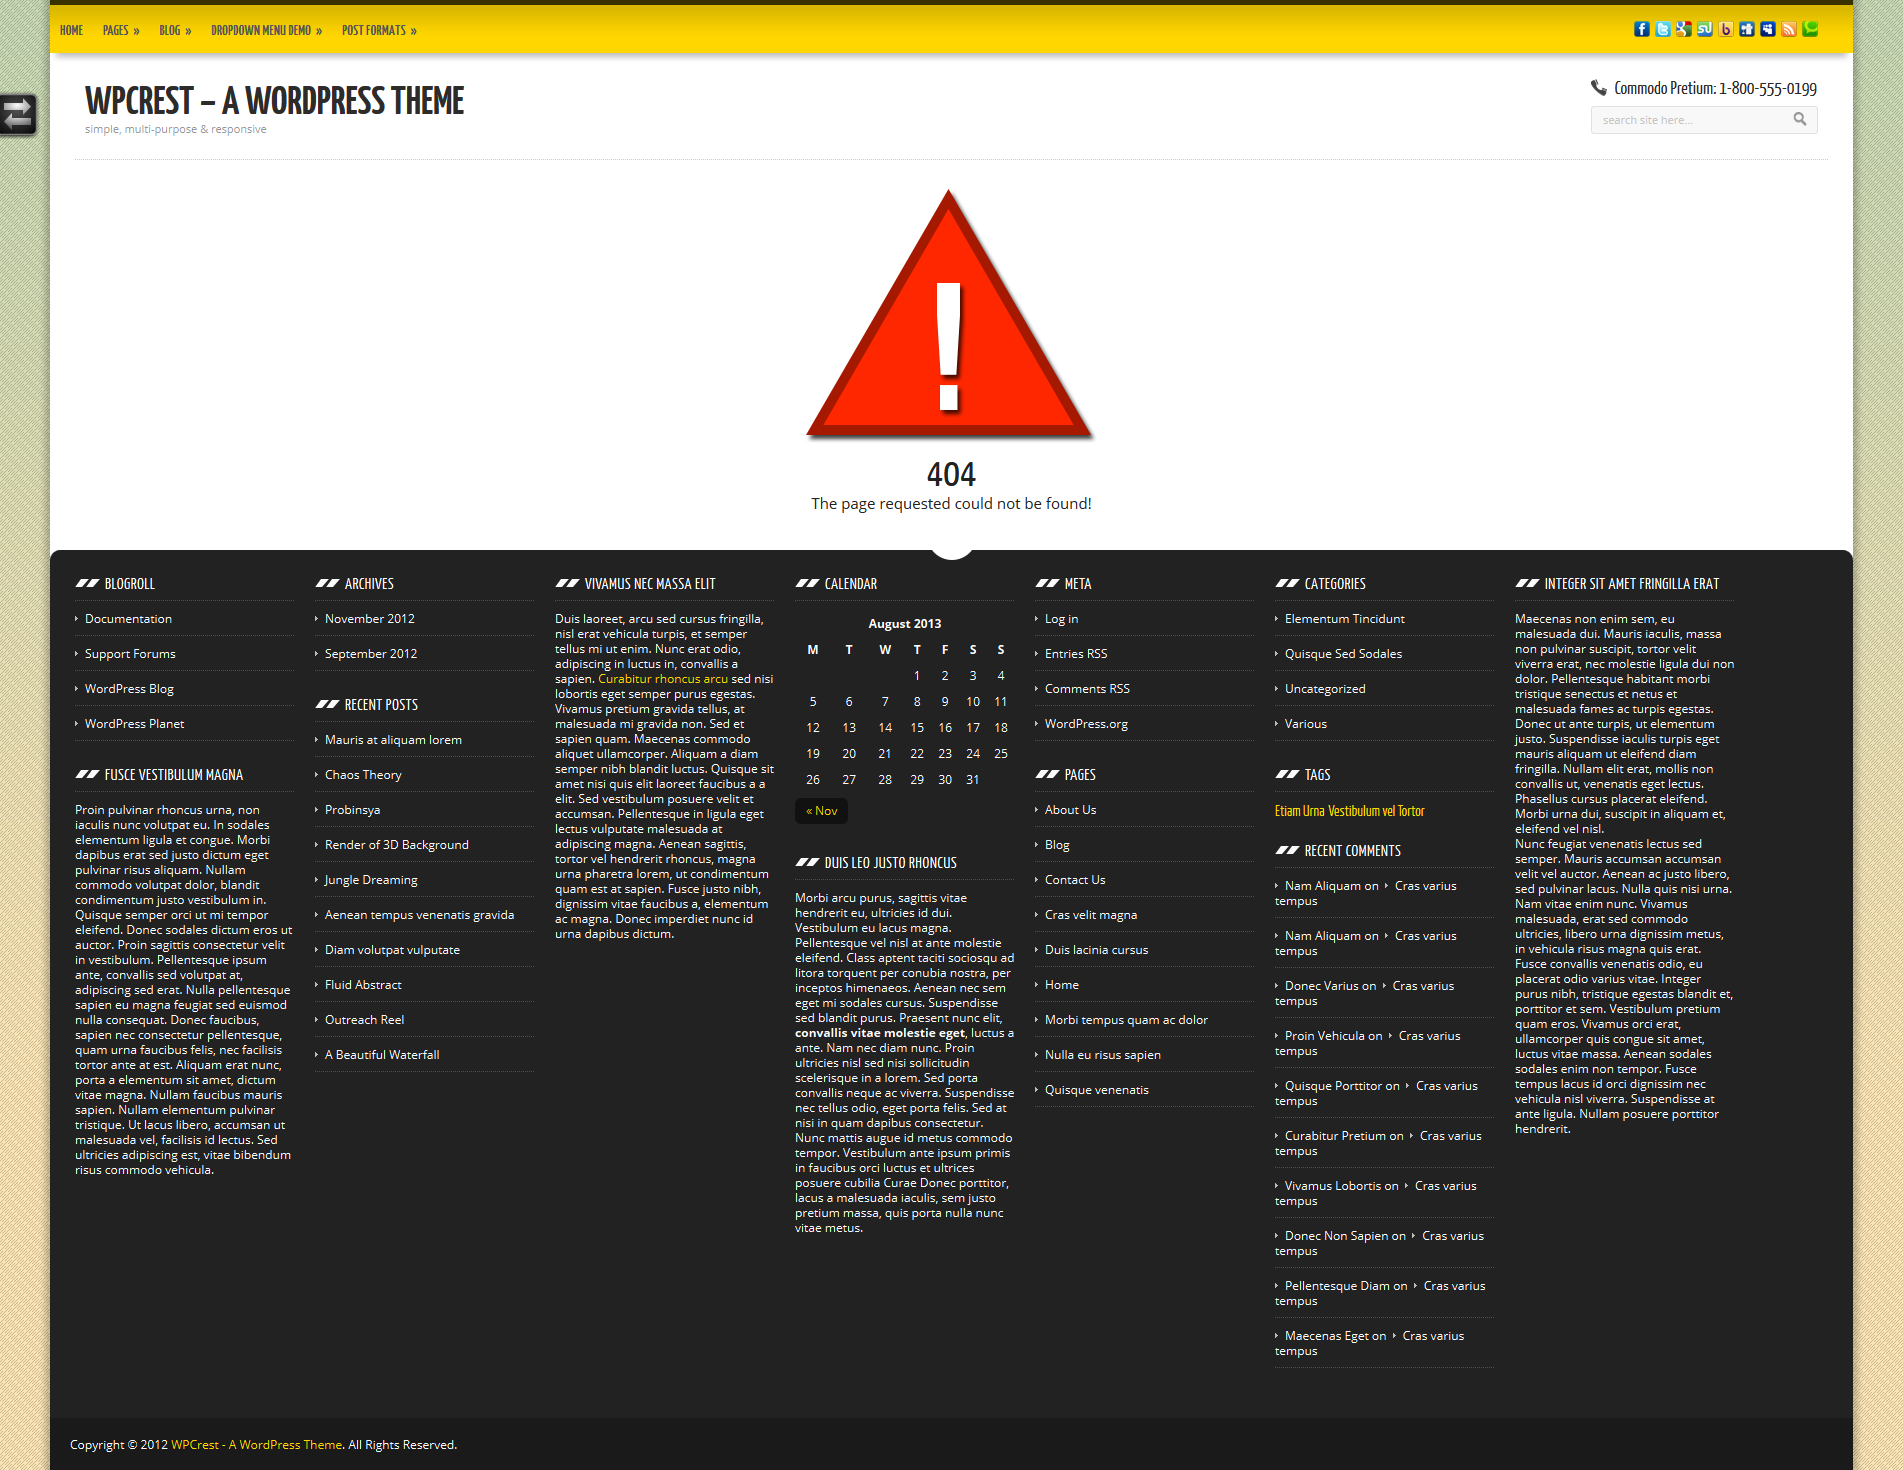
404 Page: http://demo.rhyzz.com/wordpress/wpcrest/nunc-sit-amet-orci/
Installing the theme
This section covers the installation of this theme.
You must have download and install the free parent version of this theme from here. Do not activate this version though!
Prerequisites
The only prerequisites I assume are as follows:
Using Automatic Install
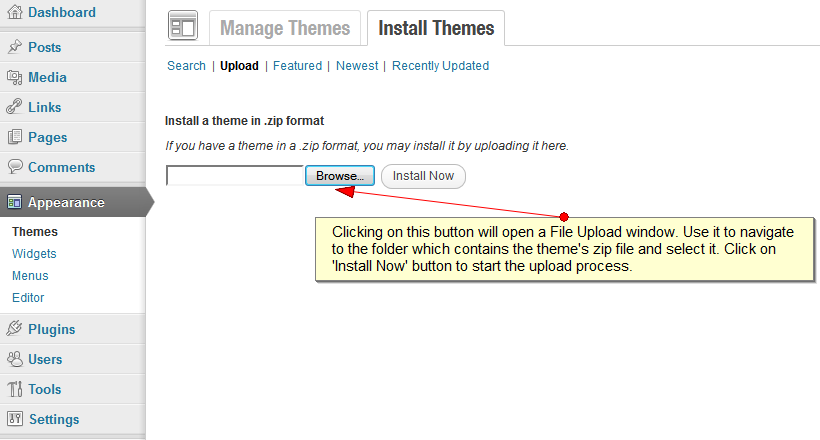
This one is the quickest way to install the theme! All you have to do is navigate to Appearance -> Themes -> Install Themes from your WordPress administration area. Once there, click on the 'Upload' link on the top.
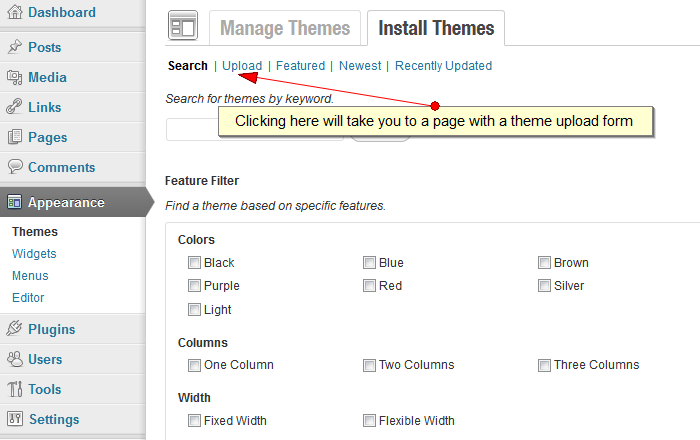
Now that you have the theme upload form on your screen, click on the 'Browse' button and navigate to the folder which contains the file named 'wpcrest-extended.zip' and select it. Click on the 'Install Now' button and wait! Your theme should be installed in a jiffy!
Your theme should now be installed! Congratulations!
You can now head towards the Initial Setup sub section.
Plugins
Required Plugins
WPCrest requires that you have the following plugin installed and activated to manage options from the backend.
Optional Plugins
WPCrest has in-built support for the plugin below. So all you have to do is just install and activate these plugins and you are done.
Configuration
Now that you have installed the theme successfully, you should be seeing a new menu on the bottom of the sidebar of your administration panel labeled 'WPCrest'.
This menu is divided into various sub menus. The basic configuration of the theme is done using the Configuration sub menu.
Site-wide
Header Section
Title / Logo
- Use a Logo
- Enable this option if you want to use an image based logo rather than text for the title and description.
- Logo URL
- Enter URL of your logo image here or upload one. This image will only be used if the above option is enabled.
- Link Title or Logo to
- Enter URL you want the title/logo to link to. Leave this blank if you don't want them to be a link.
User Support
- Enable User Support
- Enable this if you want to display a support section in the header which can display a text message of your choice.
- User Support Icon
- Specify icon to display if you don't want to use the default telephone icon. The theme also includes an email icon.
- User Support Text
- Enter your Call to Action text which you want displayed next to the icon.
Search Form
- Search Input Placeholder
- You can use this field to replace the default search input placeholder with something custom
General
- Disable Page Preloader
- While the content of a page is downloaded and loaded, a preloader is displayed. You can disable this behaviour using this option to prevent the display of a preloader.
- Disable AJAX Preloader
- Similar to the above except that this one is displayed during AJAX requests.
- Disable AJAX Pagination
- By default AJAX is used for navigating through paged sections of archives. This means the page won't have to reload when a user clicks on a link inside the pager.
- Default Scheme
- You can select the default scheme you want to use from here. If you select None here, the grayscale version of the theme will be displayed. Remember, if you disable the scheme switcher then the scheme you select here is the one which will be visible to your visitors.
- Disable Scheme Switcher
- If you do not want to let visitors be able to switch the site's scheme that is visible to them then you can choose to disable the scheme switcher using this option. Default value for this is no.
- Open External URLs in New Window
- By default all external links are configured to open in a new window. You can disable this feature to prevent that from happening.
- Open Media URLs in New Window
- Enable this if you want URLs pointing to media like images or PDF documents to open in a new window.
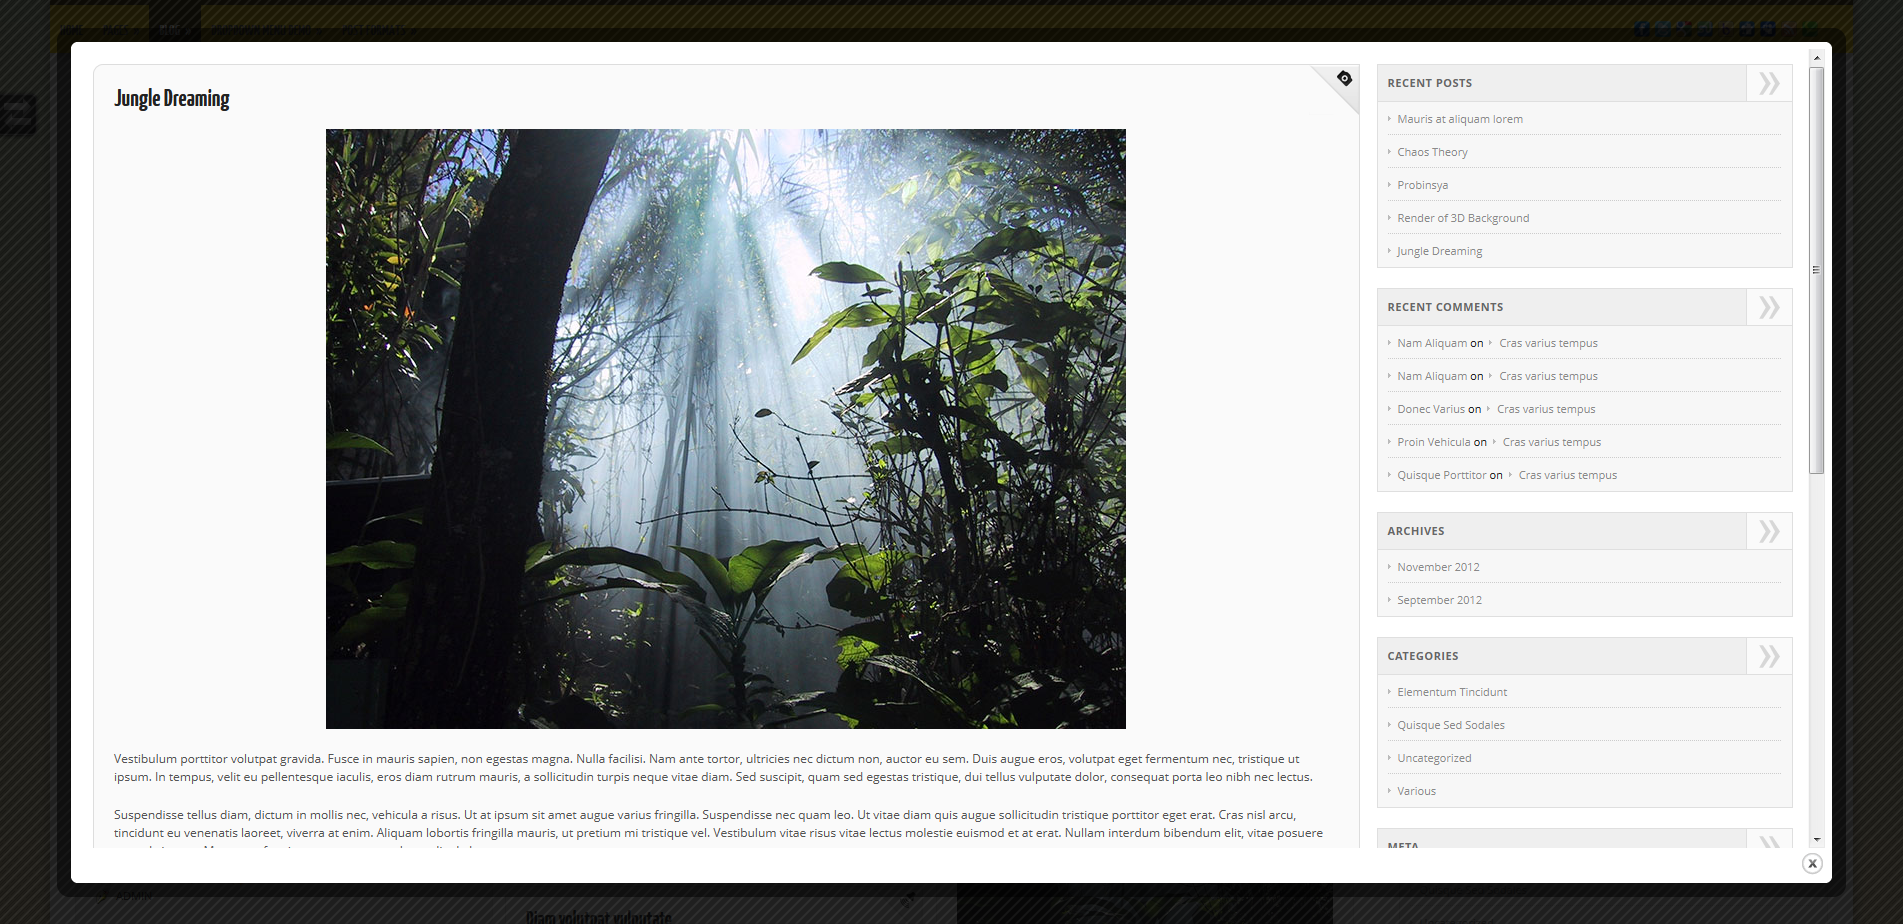
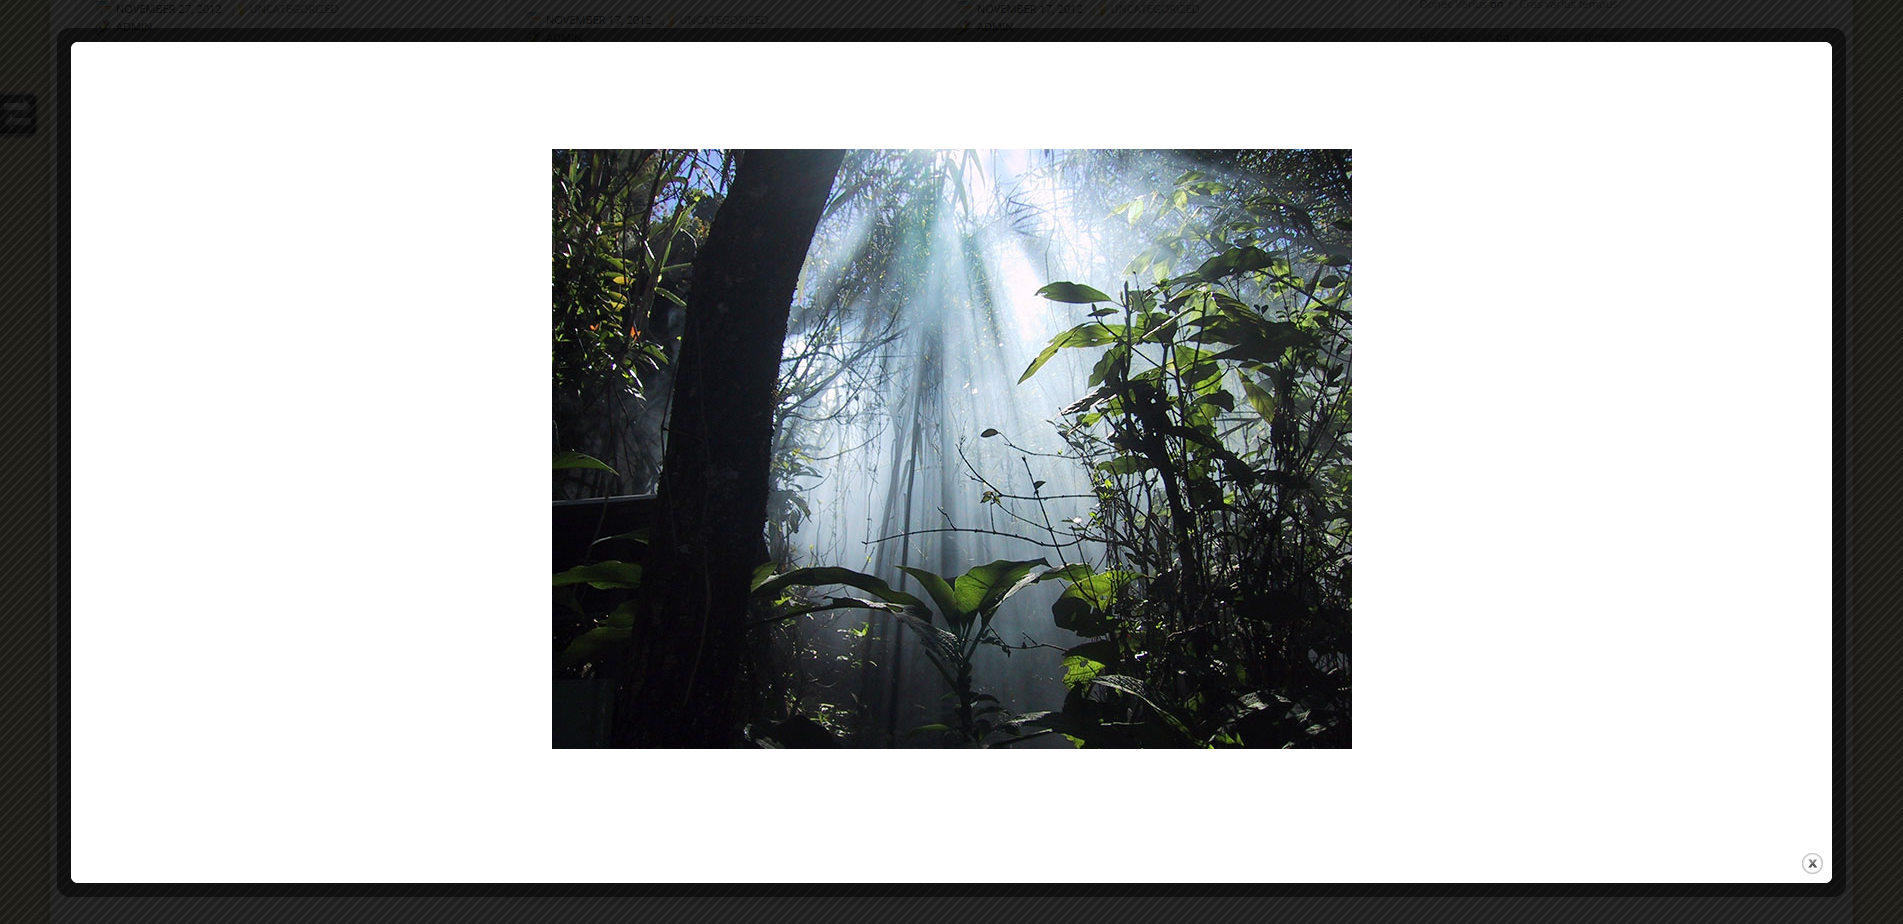
- Enable Lightbox
- Enable this option if you want links pointing to images to open in a modal dialog using Lightbox
- Copyright Notice
- Use this area if you want to display a custom copyright message on the footer of your website
- 404 Message
- Use this area if you want to display a custom message on your 404 error page
Comments Support
- Disable for Posts
- By default comments are enabled for posts. You can disable this using this option.
- Enable for Pages
- By defaults, comments are disabled for pages. You can enable them using this option.
Custom Headings, Labels and URL Slugs
Headings
Taxonomies
Use %s as replacement substitution for the respective taxonomy term
- Category
- This is the heading that's displayed on Category archive pages
- Tag
- This heading is displayed on the Tag archive pages
Date-based
Use %s as replacement substitute for year, month or day respectively
- Yearly
- This is the heading that's displayed on yearly archive pages
- Monthly
- This one is displayed on monthly archive pages
- Daily
- This one is displayed on the daily archive pages
Search Results
Use %s as replacement substitution for query being searched
- Main
- This is the main heading that's displayed on the search results pages
- Posts
- This is the sub heading that's used by the posts section on the search results page
- Pages
- This is the sub heading that's used by the pages section on the search results page
Others
- Author
- This heading is displayed on the author's archive page
Labels
- Attachment Browser
- This label is displayed on the attachment's page just below the image
- Current Attachment
- This label is used for the section that displays the current attachment number
Links
Social Media
The social media icons section on the top right area is controlled using this section. Enter your links for the services you would like to use. The title field is used as the alternative image for respective social media icons.
Homepage Section
Use this section to configure the homepage
General Configuration
- Disable Automatic Insertion
- By default your slides, teaser and featured content are inserted automaticlly on the homepage. If you want more control over your homepage then you can disable automatic insertion and add these manually from the content editor by using their relevant shortcodes.
- Disable Page Content on bottom instead
- This option lets you move the content on your homepage to the bottom.
Teaser
- Disable Teaser
- Use this to disable the teaser from appearing on the homepage
- Title
- Set the title of your Teaser
- Description
- A short description of the teaser
- Button Label
- Label for the link button
- Button URL
- URL the button points to
Featured Slides
- Disable Featured Slides
- You can disable slides using this option
- Display Slides Using
- Using this option you can decide how the slides are fetched. You can choose to select the slides you want to feature manually or you can automate this by specifying whether to fetch them by latest added or page ordering you have set.
- Featured Slides Count
- Enter the number of slides you want to feature here
Featured Posts
- Disable Featured Posts
- You can disable posts using this option
- Display Posts Using
- Using this option you can decide how the posts are fetched. You can choose to select the posts you want to feature manually or you can automate this by specifying whether to fetch them by latest added or page ordering you have set.
- Featured Posts Heading
- Heading you want to display for Featured Posts on homepage
- Featured Slides Count
- Enter the number of posts you want to feature here
Usage
This provides usage instructions for various sections.
Post Formats
WPCrest has support for 4 custom post formats viz. Image, Gallery, Video and Audio. You can create your posts using either one of these Formats or you can create it using the standard format.
To select a Post Format, while creating your post just look for the heading 'Post Format' which will probably be right under the editor. From here you can select which format you want to use for a post.
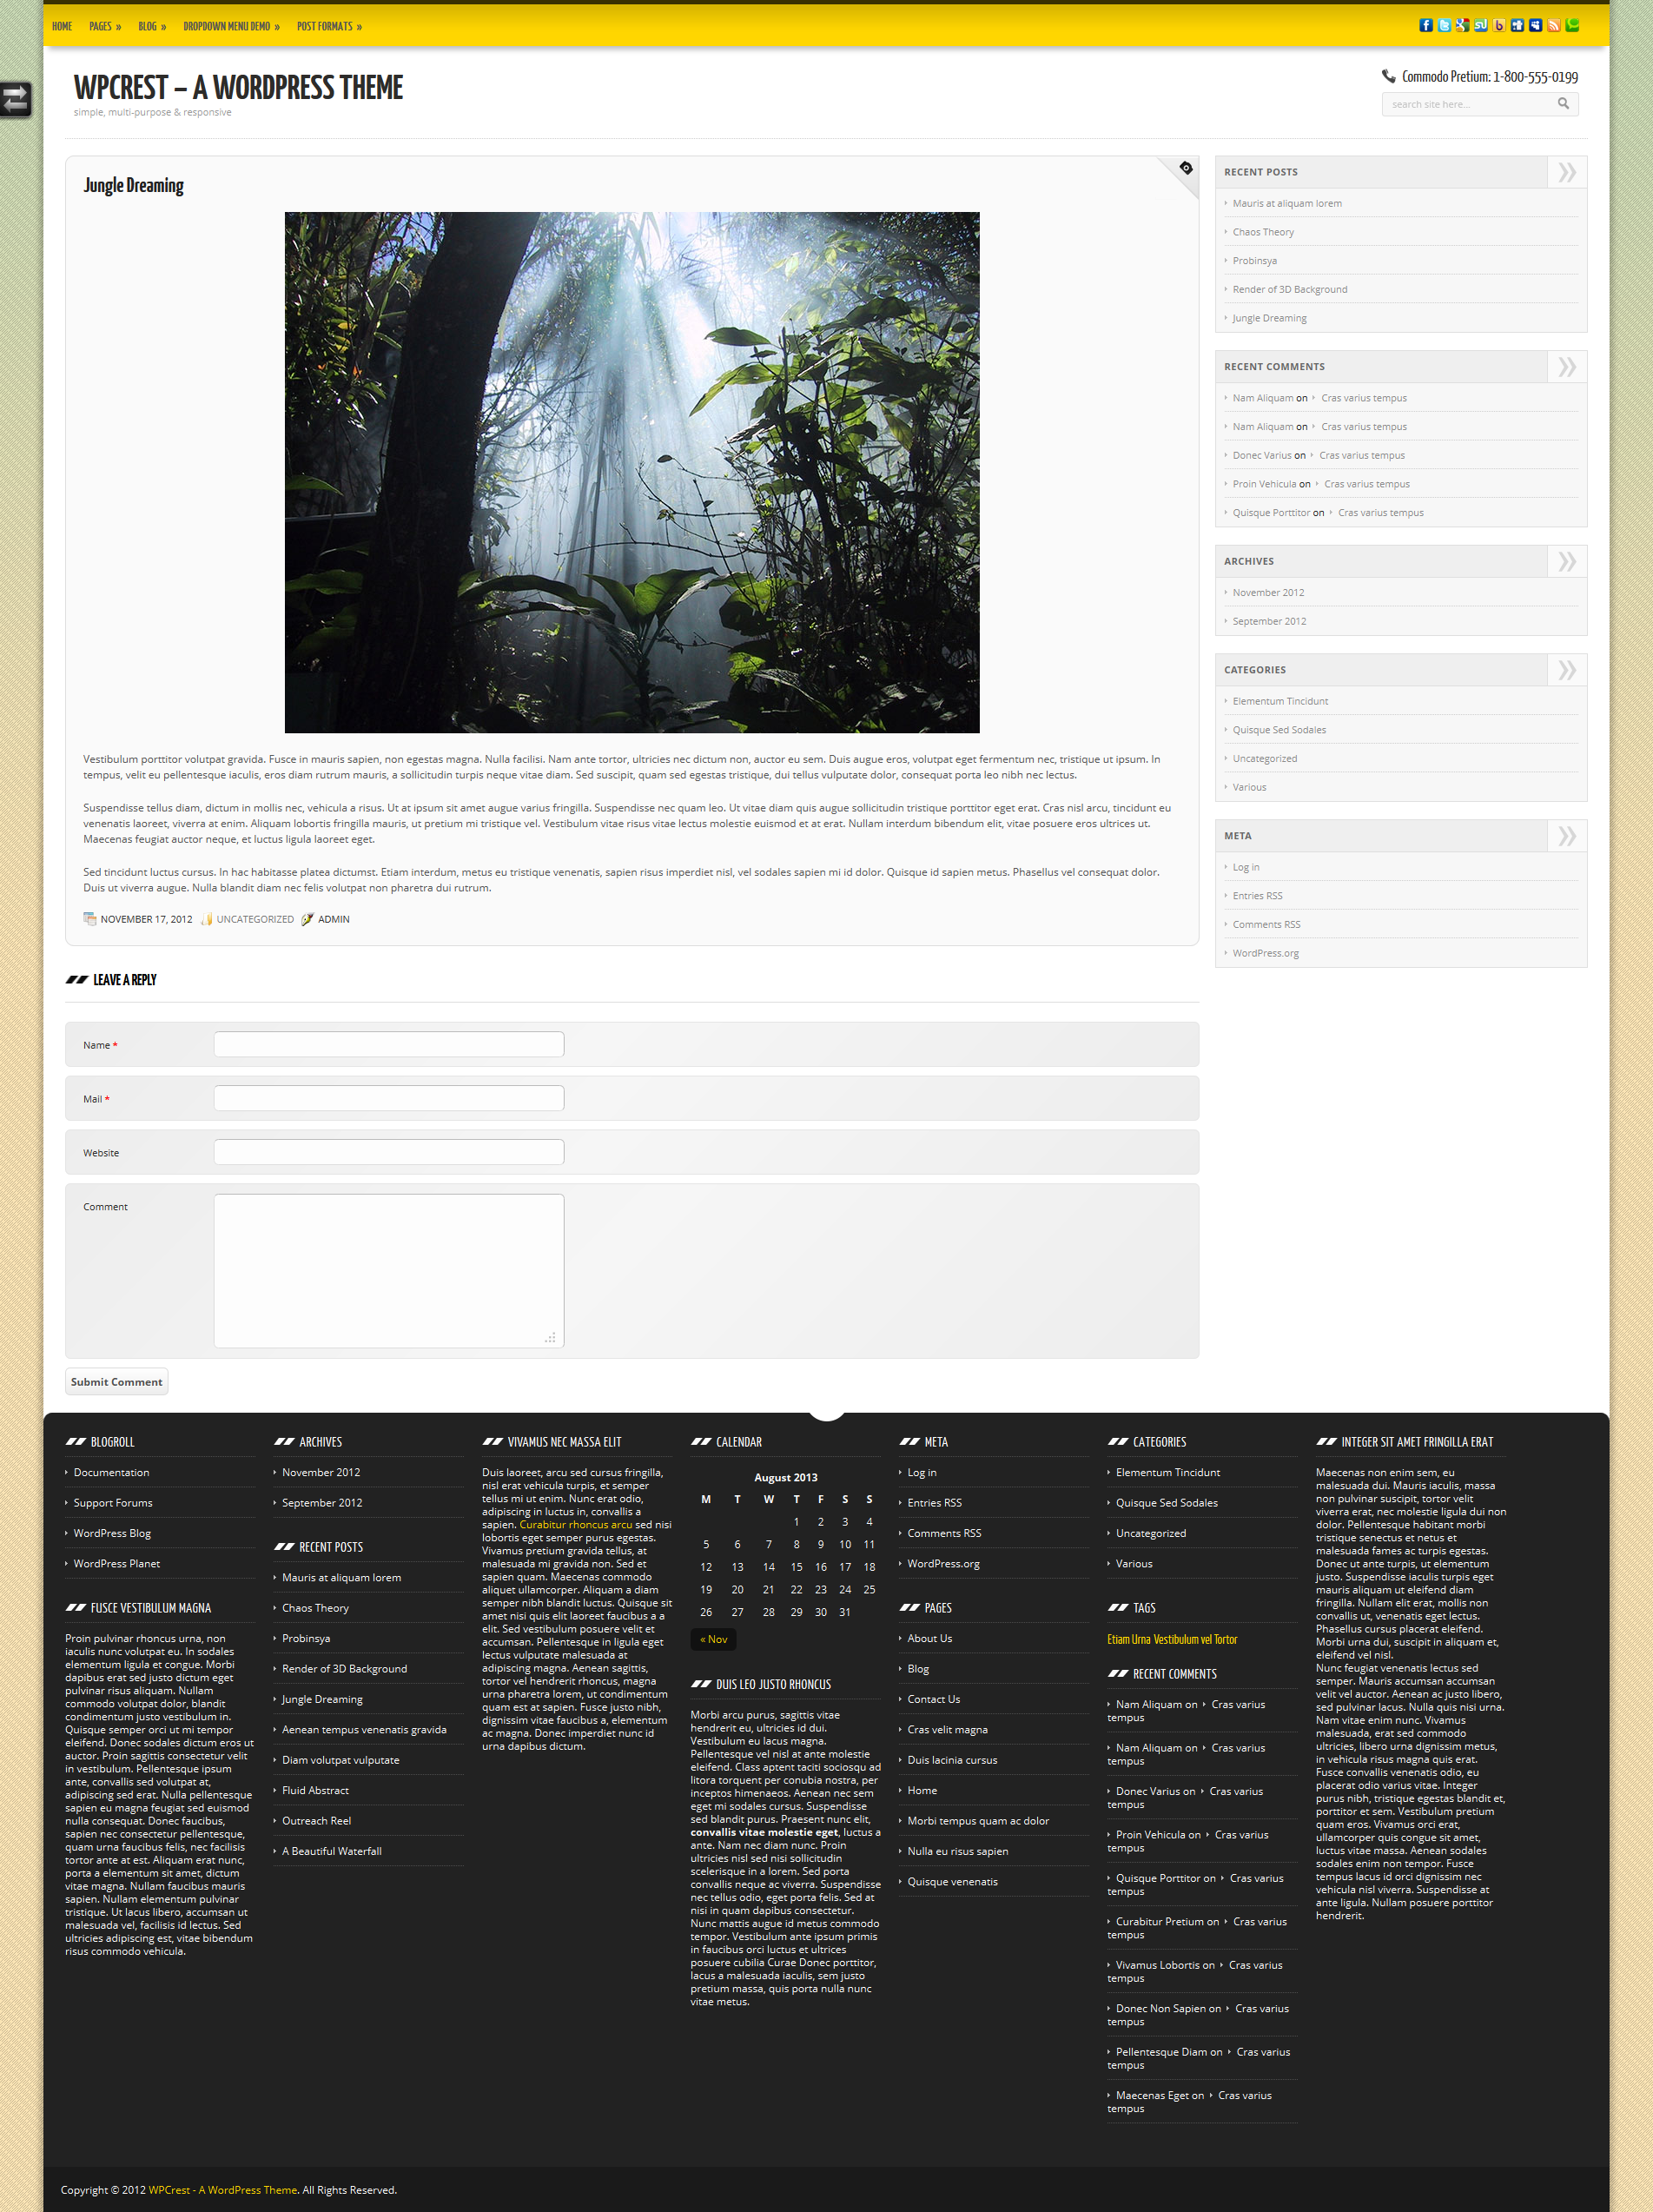
Image Format
The Image Format is suitable for posts which feature a single image.
You can upload the image you would like to feature either using the form provided under Post Formats Image section or using WordPress' Upload/Insert media section.
The former gives you more flexibility as you can provide a direct URL to the full size and small size image. The small size version isn't required however the full size version is required.
If you don't want to use this section you can just upload the image using the Upload/Insert media section. You don't need to do anything after uploading it from there as the image will be fetched automatically on the frontend.
Gallery Format
The Gallery Format is very similar to the Image Format, the diffence being that this time lets you upload more than one image, hence the name gallery.
So if you have a post which will feature more than one image then you can use this format.
Usage for this is the same as the Image Format section. If you use the Upload/Insert media section for managing gallery images, you can upload as many images as you would like and you can control ordering using the order feature provided by this section.
Video Format
The Video Format is for displaying featured videos. You can either upload the video locally or you can insert a link to an external video. You can link to a direct video file or to a video hosted using a service like YouTube or Vimeo.
Raw videos are displayed using the built-in video player. External videos are automatically embedded using their provider's player. However if this fails, they'll be loaded using the built-in player
Audio Format
The Audio Format is for displayed feature audio clips.
Shortcodes
Slider
You can insert sliders you have created into pages using the following shortcode:
[wpcrest action="insert-slider" ids="168,167"]
Here 168 and 167 are ids of the slides you have created in the backend
Scroller
You can use scrollers to feature posts in your pages using the following short codes:
[wpcrest action="insert-scroller" type="posts" heading="Condimentum curabitur tellus" ids="7,8,9,10,20,21,22,23,32,33,35,45"]
That shortcode is used for inserting posts with the ids specified and heading of your choice
Teaser
A teaser can be inserted using the following shortcode
[wpcrest action="insert-teaser" title="Fusce eget enim mollis sem" button_label="Praesent Elit Neque" button_url="#" description="Nunc viverra eros at nulla consectetur congue. Nunc ligula elit, iaculis sit amet mollis non, volutpat condimentum nunc. Donec diam ipsum, convallis eget congue interdum, varius at dui. Phasellus auctor eros ut leo commodo at aliquet tortor congue. Suspendisse nec velit sed urna condimentum scelerisque. Pellentesque a velit in felis dignissim luctus sed eu enim. Aenean auctor consectetur leo ut dictum. Donec eget velit sed ligula condimentum pellentesque. Pellentesque habitant morbi tristique senectus et netus et malesuada fames ac turpis egestas."]
This defines a teaser with a title, button label and link and it's description.
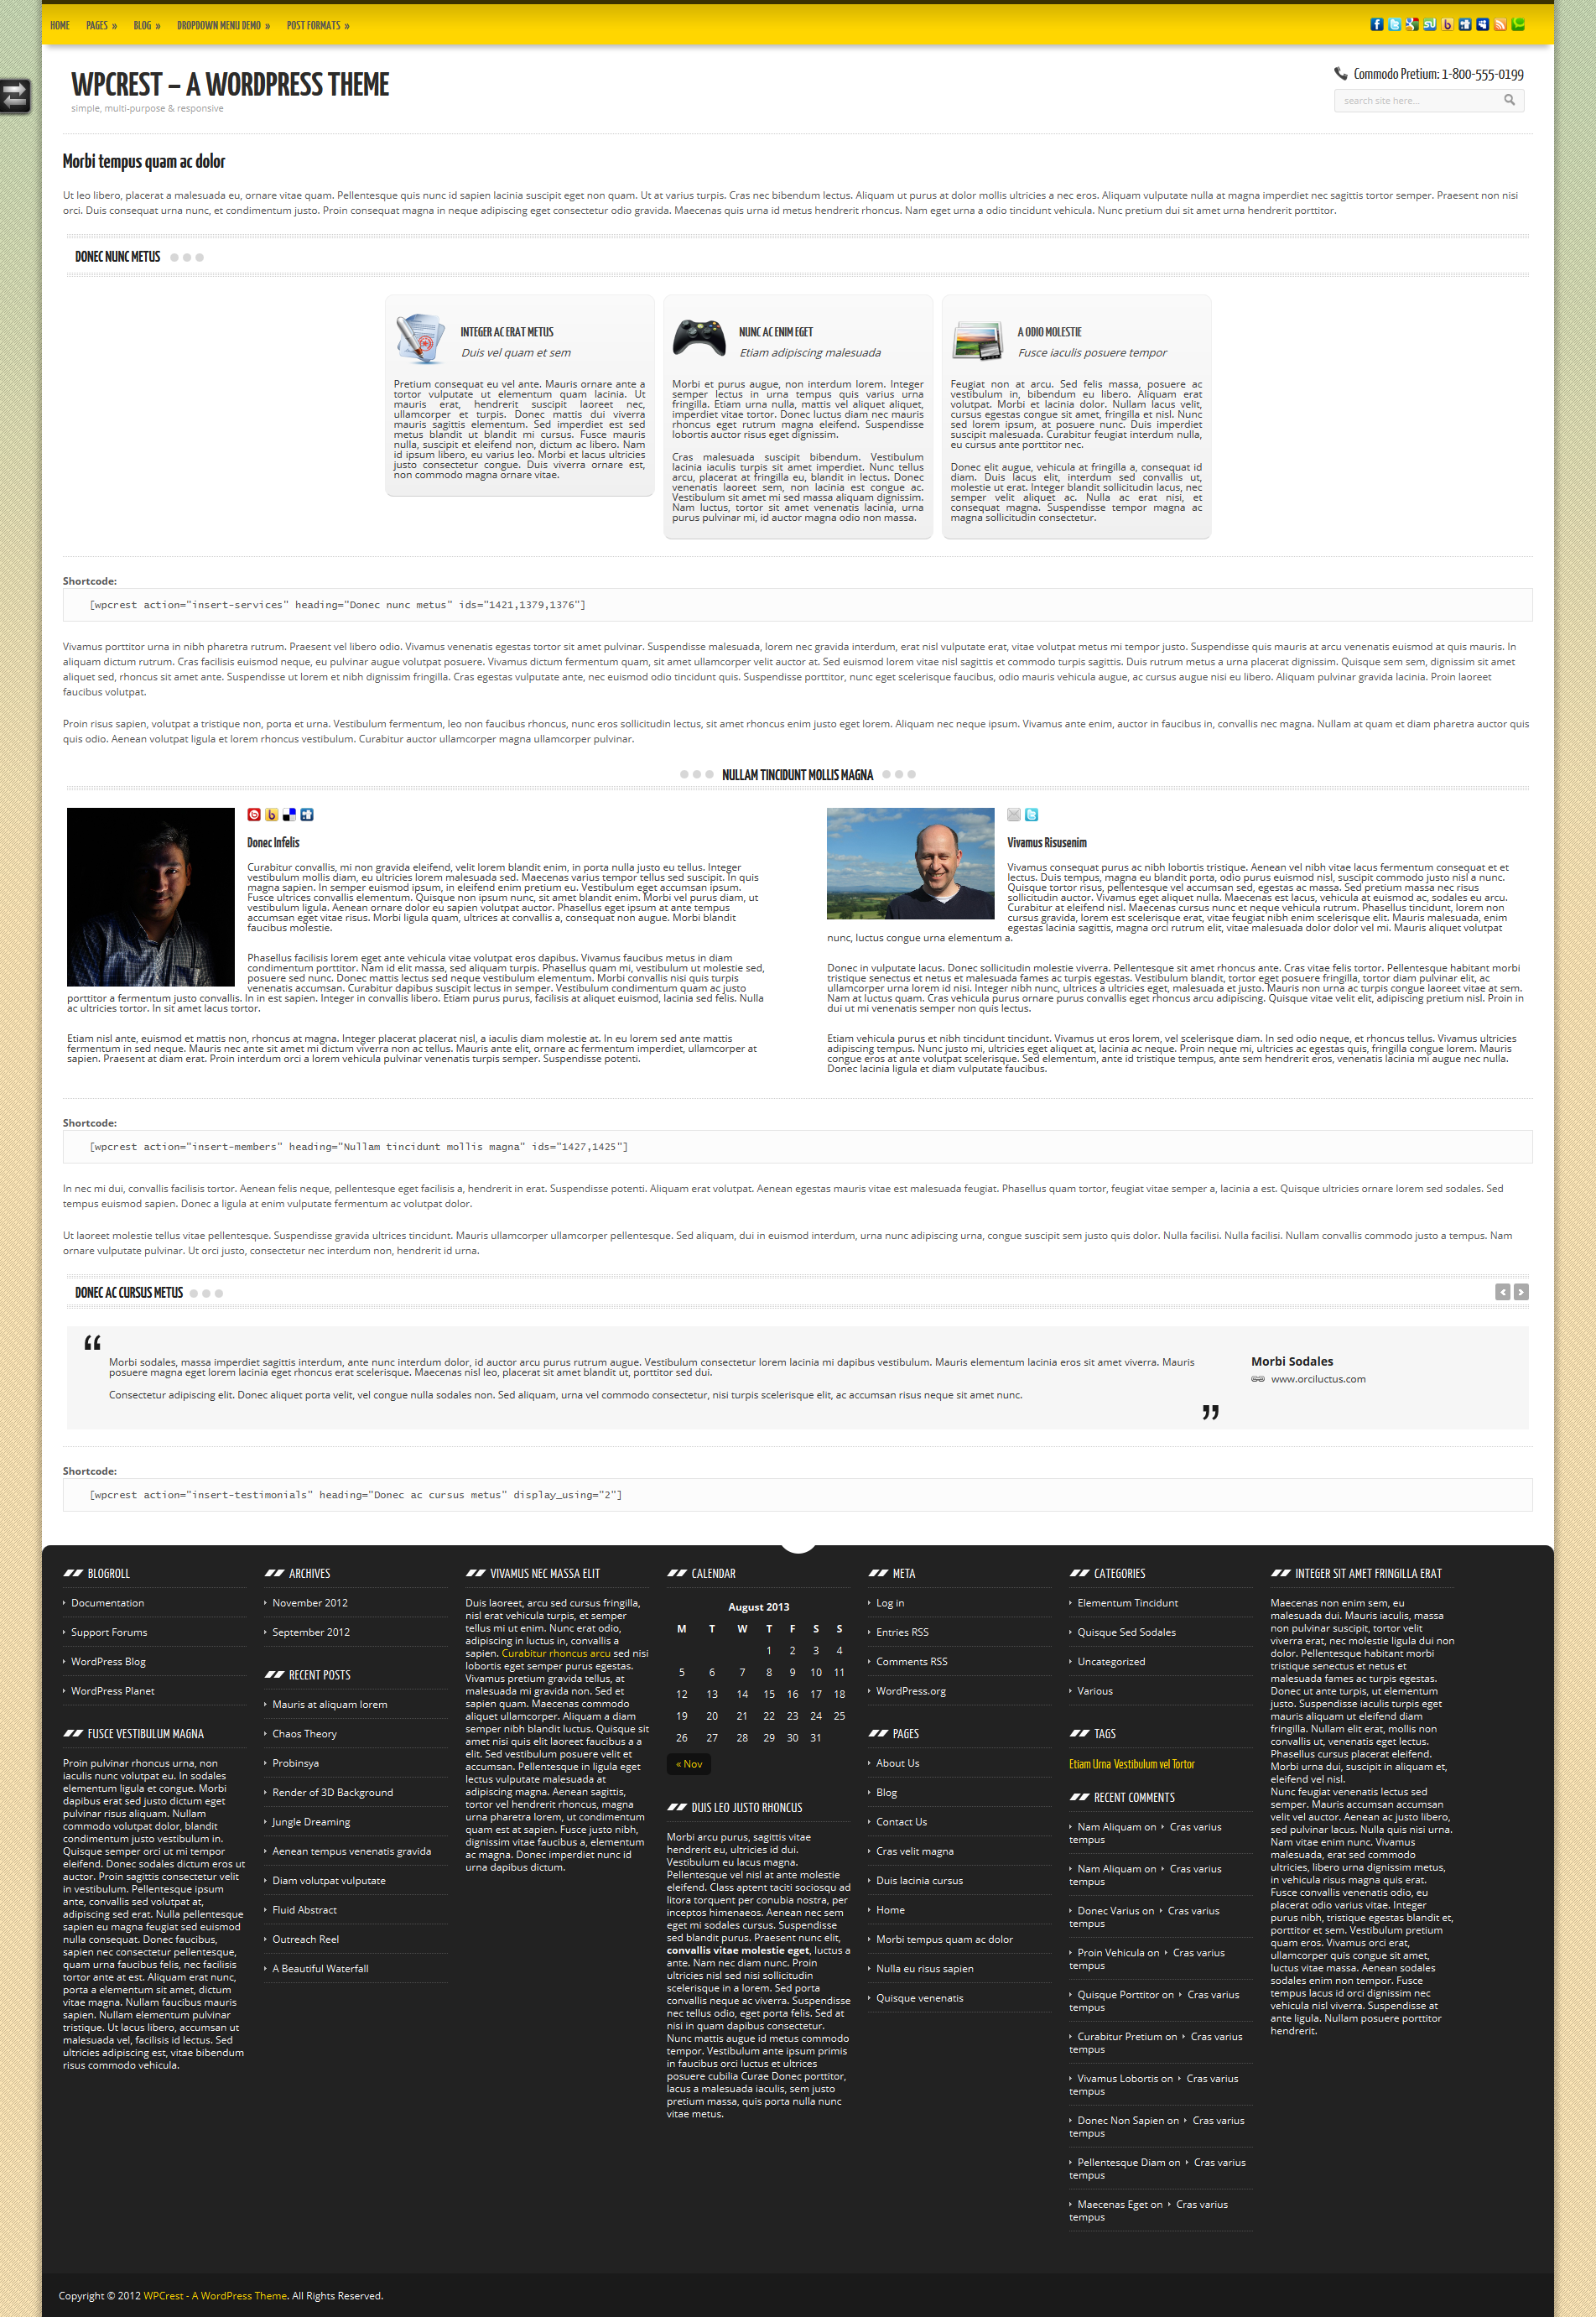
Services
You can insert services you have created into pages using the following shortcode:
[wpcrest action="insert-services" heading="Faucibus quis ullamcorper" ids="200,201"]
Here you define the ids you want to use for your services and the heading
Members
You can insert members you have created into pages using the following shortcode:
[wpcrest action="insert-members" heading="In quam dolor" ids="300,301"]
Here you define the ids you want to use for your services and the heading
Customization
As easy WPCrest is to use, it's equally easy to modify it if you have some coding skills.
There are two ways you can customize the theme. One involves the use of creating a Child theme where as the other lets you do it without creating a Child theme.
Please don't modify any of the theme files directory because your modifications will be lost when you update the theme to a latter version. Instead use one of the methods outlined here.
Without a Child Theme
The WPCrest theme provides you with the ability of modiying your theme without actually editing any of the core files. This is achieved by using custom files which you can use to add your PHP, JavaScript and CSS code. Because these files are not part of the core, you don't have to worry about them being overwritten when you update the theme whenever a new version is available. You can modify both the frontend and the backend of your website using this approach. You can use it to add new functionality or override existing functionality. This includes the ability of overriding default PHP functions used by this theme.
This method is well suited if you don't require any major customization. If you do then creating a Child Theme might be a better option.
PHP
If you want to load your own PHP code, all you have to do is create a file named functions.php and save it under WPCrest/custom/php/. This directory don't exist by default so you will have to create it first.
Preview